How to replace the brake fluid and bleed Magura MTB disc brakes
Your brakes are your lifeline. They require regular service to ensure their perfect reliability. This guide shows you how to service Magura MT brakes.
Many of us understand the theory behind replacing the brake fluid and bleeding hydraulic brakes. Still, one may still be reluctant to open the brakes because of the possible consequences of failure. We intent to rid you of your doubts with this how-to post. We will not only show you how to bleed your Magura MT series brakes, but also give you directions on how to replace the brake fluid as the two processes go hand in hand.
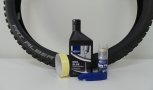
Tools
Get the right tools ready before you start. This will save you fumbling around later.
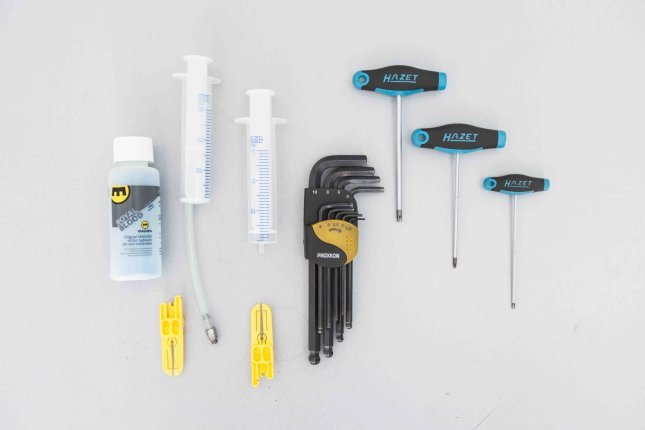
The tools you need.
| Manufacturer | Product | Product No |
|---|---|---|
| Magura | Magura EBT Pro Bleed Kit for Disc and Rim Brakes | 28783 |
| Magura | Bleed block for Magura MT brakes | 42050 |
| Magura | Magura Syringe | 16758 |
| Proxxon | 9-piece Allen Key Set | 31052 |
| Hazet | Allen Key with T-Handle | 30546 |
| Hazet | Torx Key with T-Handle | 30547 |
Preparations
To avoid pressure build-up during the bleed process, you have to prep the syringe that is used at the lever, the one without the hose. Simply punch a little hole into the upper third of the sidewall of the syringe barrel. Make sure you cut away any excess material on the inside so the plunger can move freely.
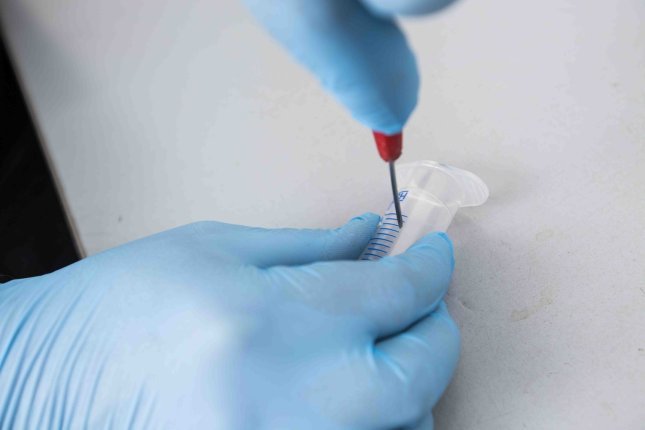
Perforate the syringe with a little hole to avoid pressure build-up.
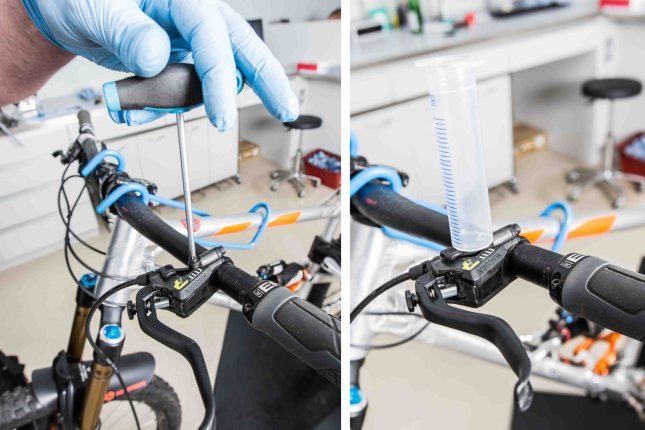
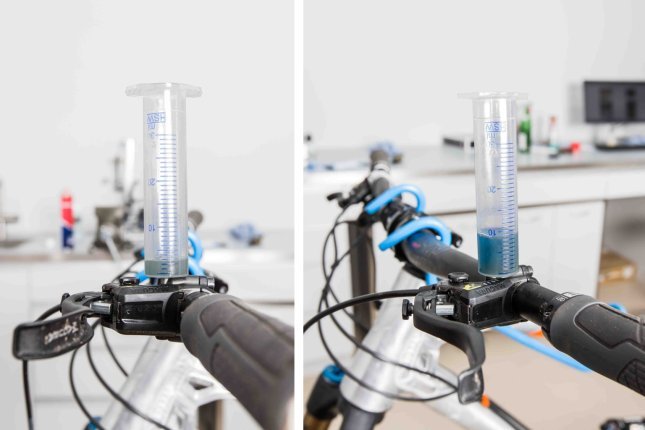
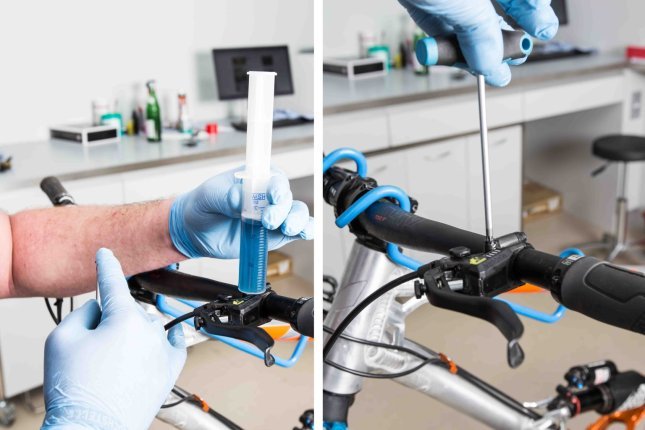
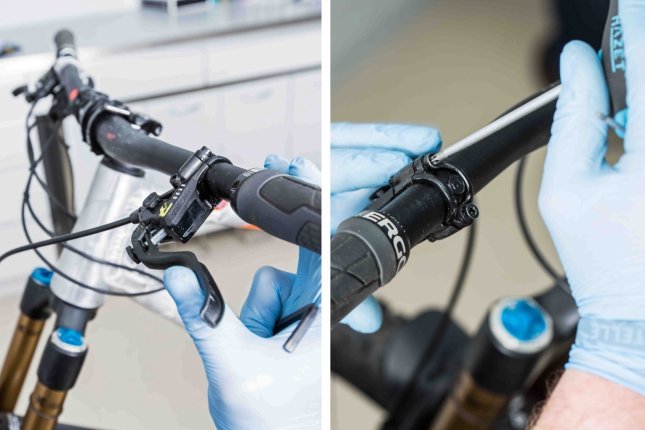
Preparing the brake lever
Make sure the lever sits horizontally, to allow the air bubbles to rise without any obstruction.
- Loosen the clamp
- Set brake lever horizontally
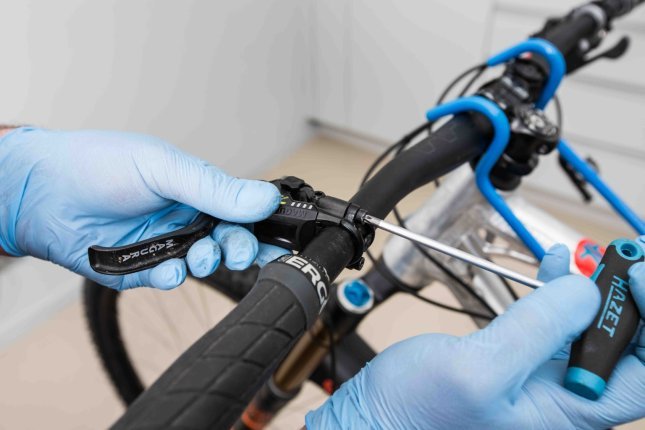
Set the brake lever horizontally.
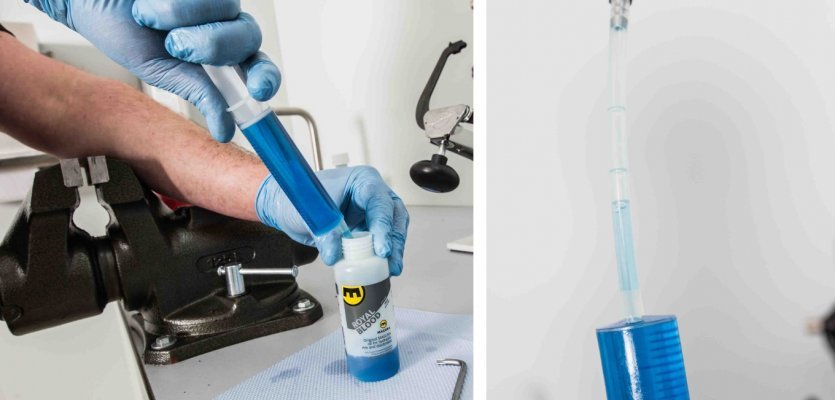
Filling the syringe with Royal Blood brake fluid
Fill the syringe with the attached hose about half way with Royal Blood, the Magura brake fluid, and you are ready to go.
The following video will show you how the bleed is done in a record 20-seconds. It’s German only, but fun to watch and still helpful to picture the process. Afterwards we’ll go through the process step by step.
Step-by-step filling instructions
The brake fluid should be replaced annually on Magura brakes. You will use the tools we have prepared above.
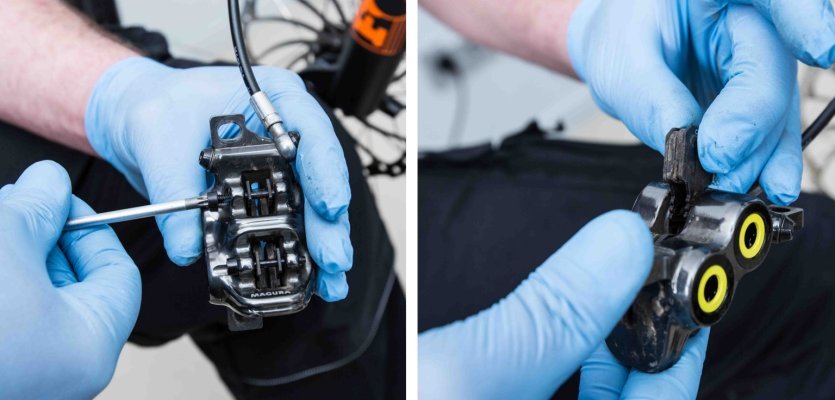
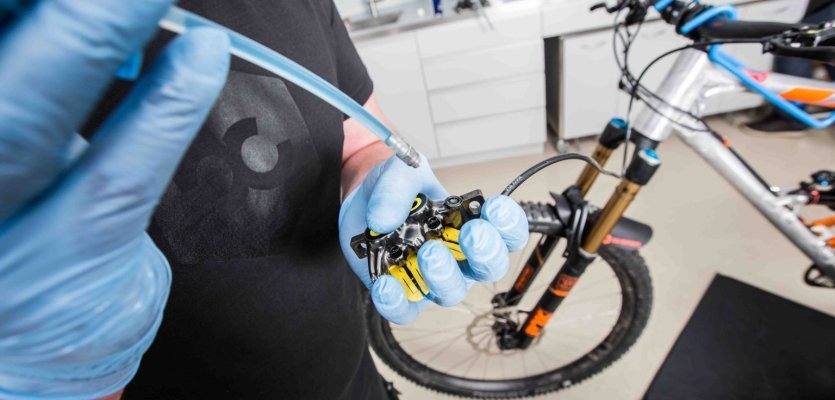
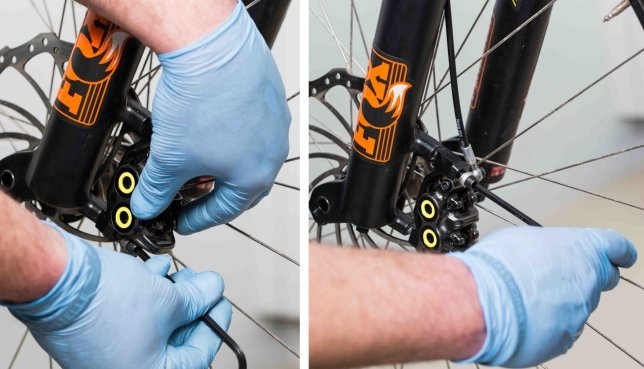
Preparing the brake caliper
A freely dangling caliper is easier to service, so detach it from the fork.
- Loosen the caliper on the fork
- Loosen the brake line on the fork
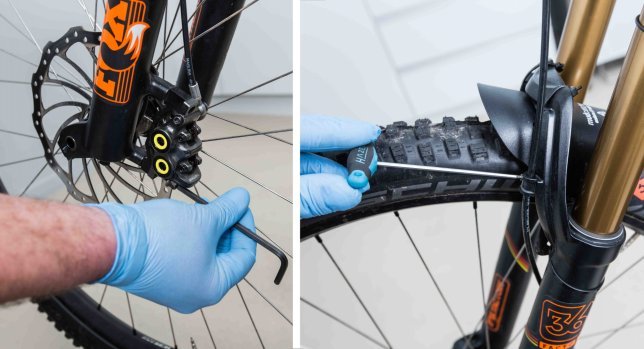
Remove the caliper and the brake line.
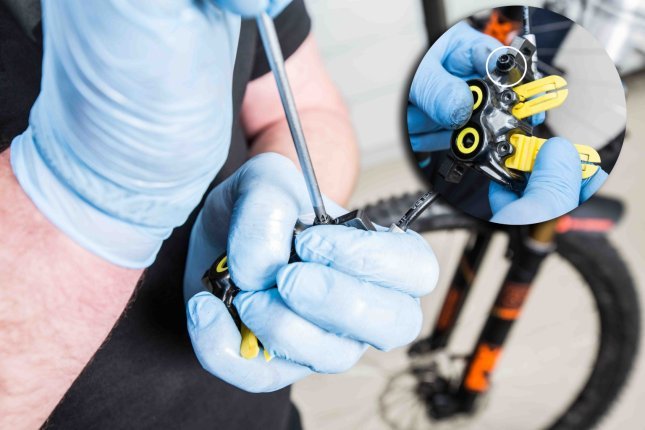
Brake pad removal
Remove the brake pads to avoid contamination with brake fluid.
- Loosen brake pad bolt
- Push the pads inwards. They are held by magnets, hence you will feel a slight resistance
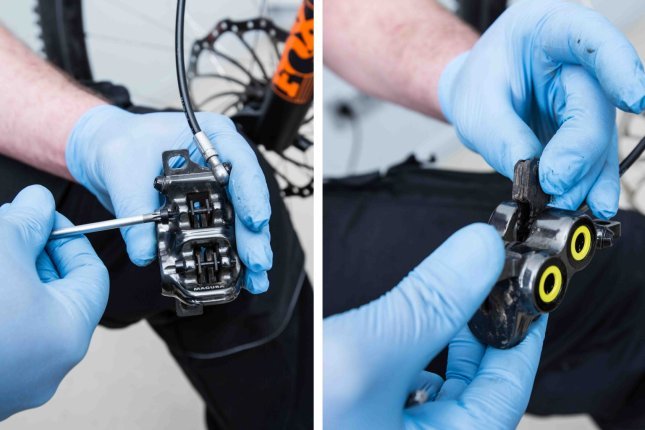
Remove the brake pads.
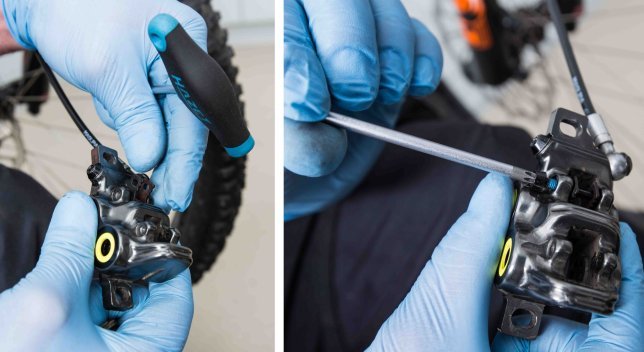
Installation of the bleed blocks
Substitute pads with the transportation guards. This way the pistons are retained.
- The transportation guards are slid in from below pushing upwards
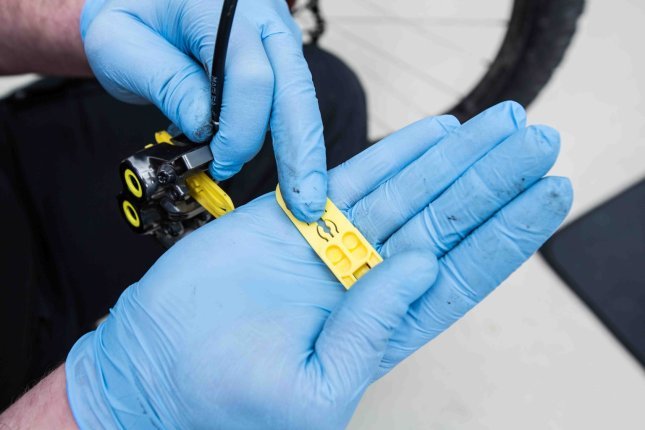
Put in the bleeding block.
-
The brake pad bolt holds the guards in place
Fix the bleeding block.
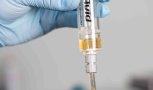
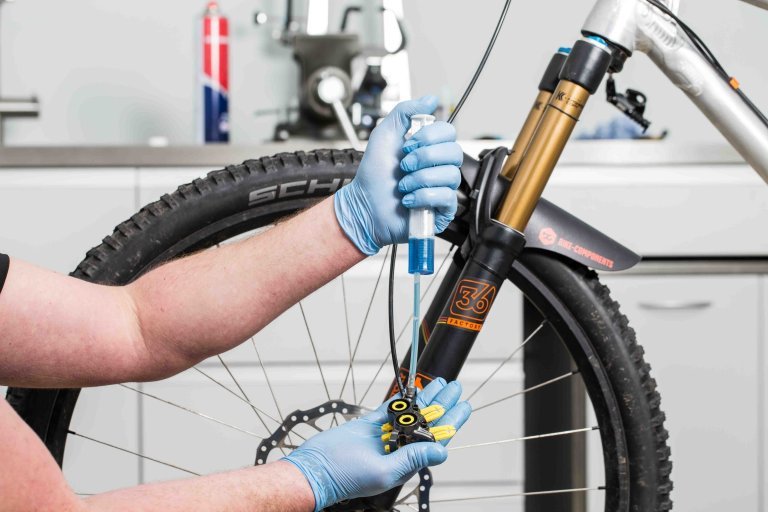
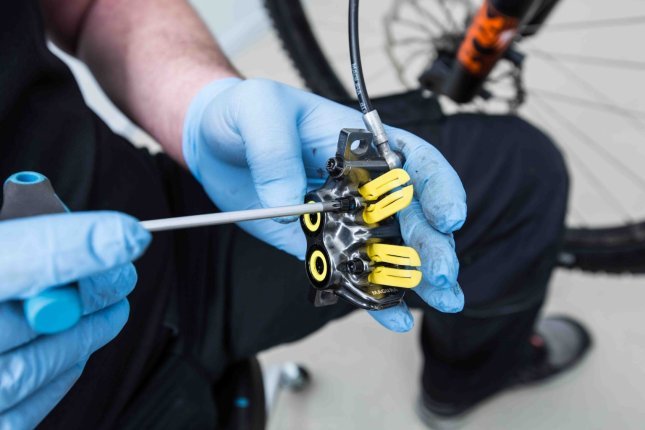
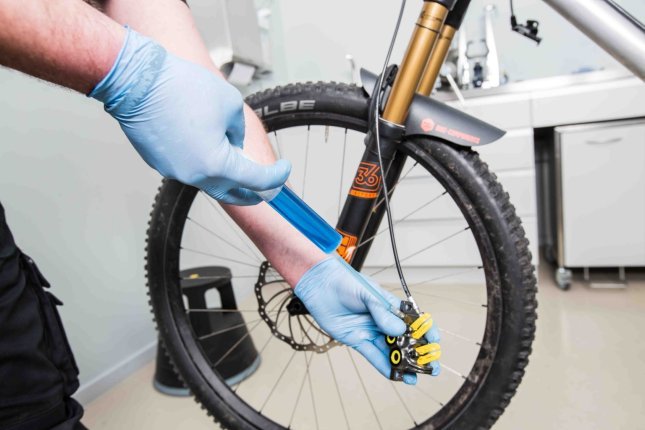
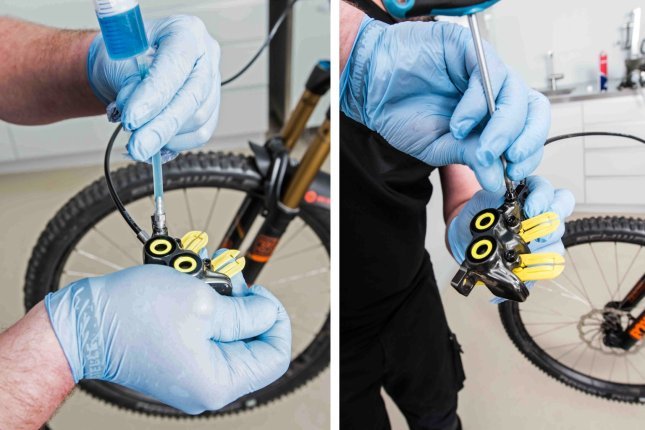
Preparing the syringe with Royal Blood
Once you open the caliper, the syringe has to be attached. Therefore it makes sense to prepare it now.
- Fill the syringe with the hose attached with brake fluid
- Make sure all air bubbles have been released from the hose by moving the plunger back and forth
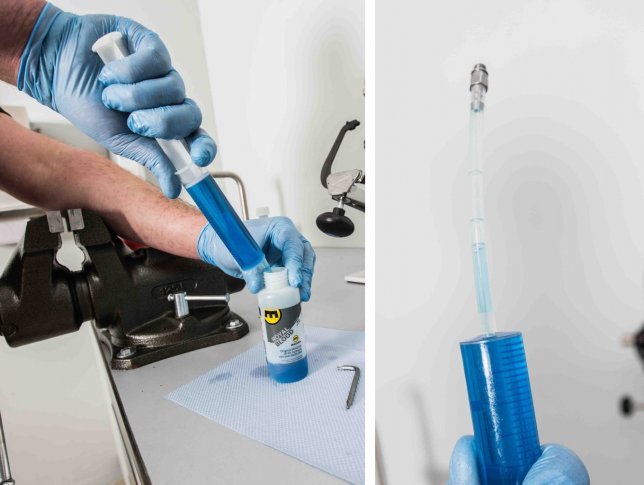
Fill the syringe with Royal Blood brake fluid.
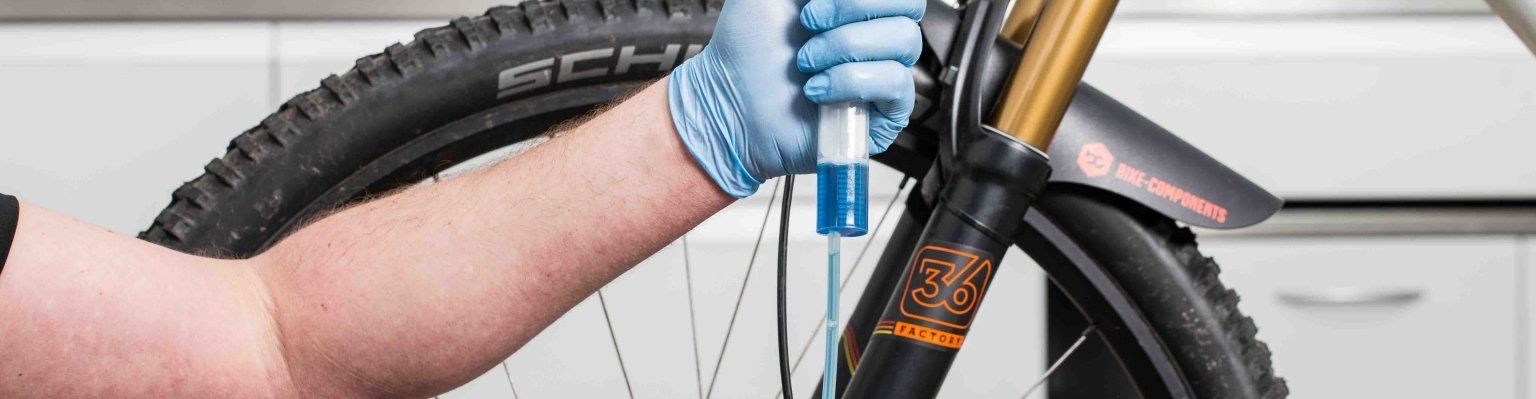
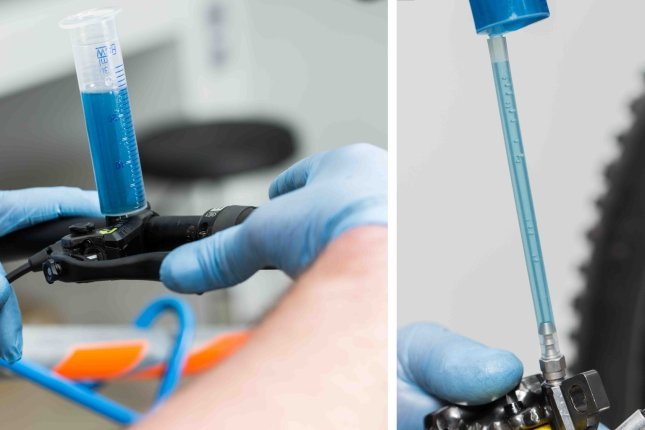
Filling the system with brake fluid
- Take the caliper and make sure to hold it higher than the lever
Remove the bleed port screw.
- Now unscrew the bleed port screw at the caliper (Torx 25)
- Screw the syringe into the caliper
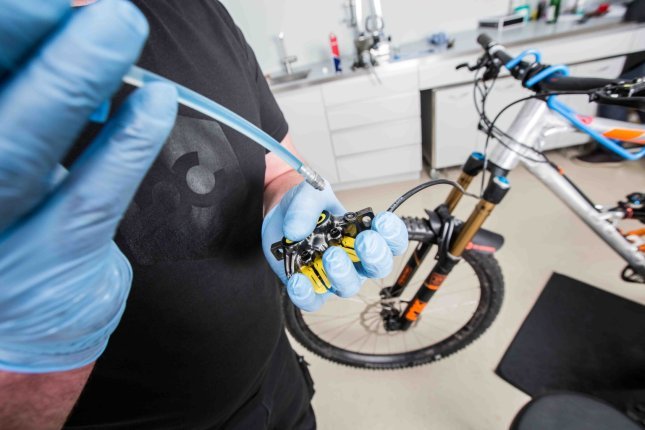
Attach the syringe.
- Once the syringe is attached, you can lower it again and let it dangle
-
Open the bleed port at the lever and attach the syringe (with the prepped hole)
Open the bleed port at the lever and attach syringe.
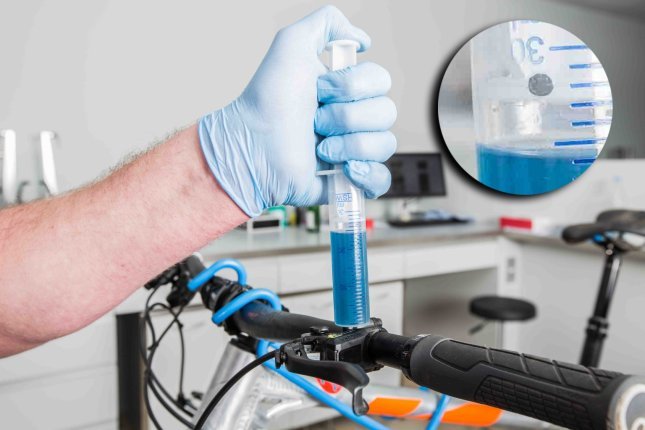
- Now start filling the system by pushing the plunger on the syringe at the caliper, moving the new brake fluid slowly through the brake lines from the caliper towards the lever
Push the fluid through the system from the caliper to the lever.
- The old Royal Blood brake fluid will start collecting in the syringe that is attached to the lever
- The new fluid is more transparent. Once you see it appear in the syringe at the lever, you can stop pushing
New brake fluid vs. used brake fluid.
Bleeding
After filling the system, air bubbles have to be removed.
- Actuate and let go quickly of the brake lever for several times
- Tap against the brake caliper and the lever housing
- Push the fluid back and forth by moving the plunger at the filling syringe
- Continue until air bubbles stop travelling to the syringe at the lever
Bleeding: One can see the air bubbles rise to the top.
Now you have successfully replaced the brake fluid and bled the brake system. Time for reassembly.
- Before you start, push in the plunger of the syringe at the lever until the hole you created is covered. This way you will avoid spillage.
The syringe at the brake lever with the perferated sidewall.
Have the bleed port screw, the Torx key and a rag ready.
- Remove syringe from caliper and close bleed port with the screw
- Wipe off excess brake fluid from caliper
Removing the syringe and closing the bleed port.
Once the syringe on the caliper has been removed and the bleed port screw has been replaced, the syringe at the lever can be removed.
- Remove the syringe from the lever
- Replace the screw. Be careful, only tighten lightly
Sealing the bleed port.
Cleaning
The brake system is sealed again. Wipe off excess brake fluid and clean caliper and lever with brake cleaner.
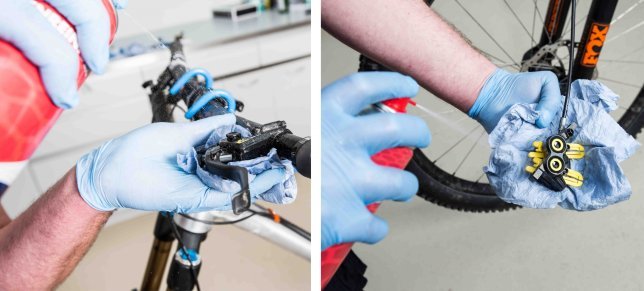
Clean off excess brake fluid with brake cleaner.
Reassembly
- Remove the bleed blocks
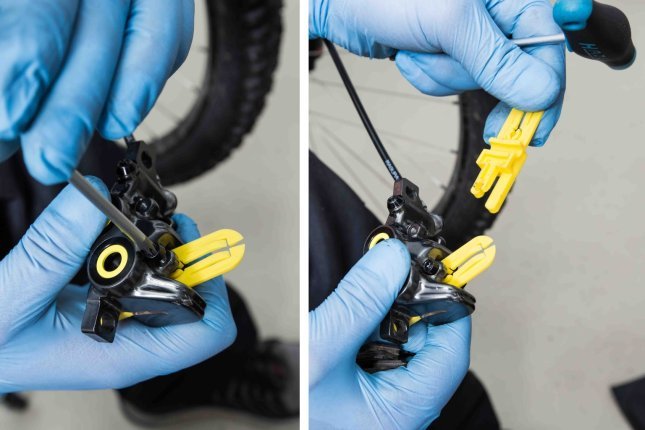
Remove bleed blocks.
- Replace brake pads. Don’t forget the brake pad bolts.
Put the brake pads back and lock with bolt.
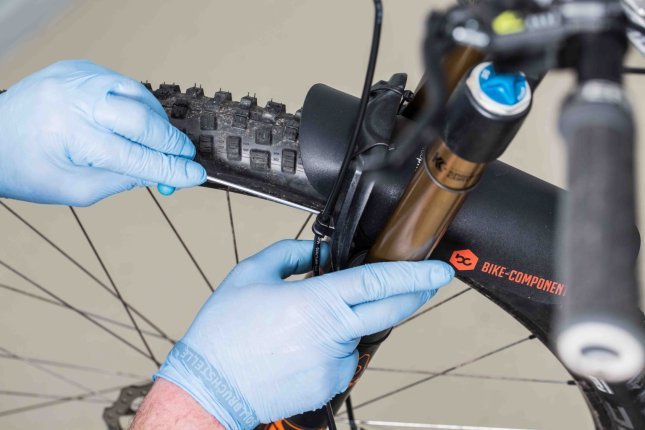
- Attach the caliper to the fork and find its correct position.
Adjust and position of the caliper.
- Find the correct position of the brake lever and fasten clamp
Reposition and fasten the brake lever.
- The last step is attaching the brake line back to the fork.
Make sure the brake line is routed correctly.
Before you jump back on the bike, pull the lever a few times to make sure the contact point is solid. Should it still be spongy, more bleeding is needed. Simply repeat the steps above, pushing the fluid back and forth, actuating the lever and tapping the caliper – of course without replacing all the brake fluid again.