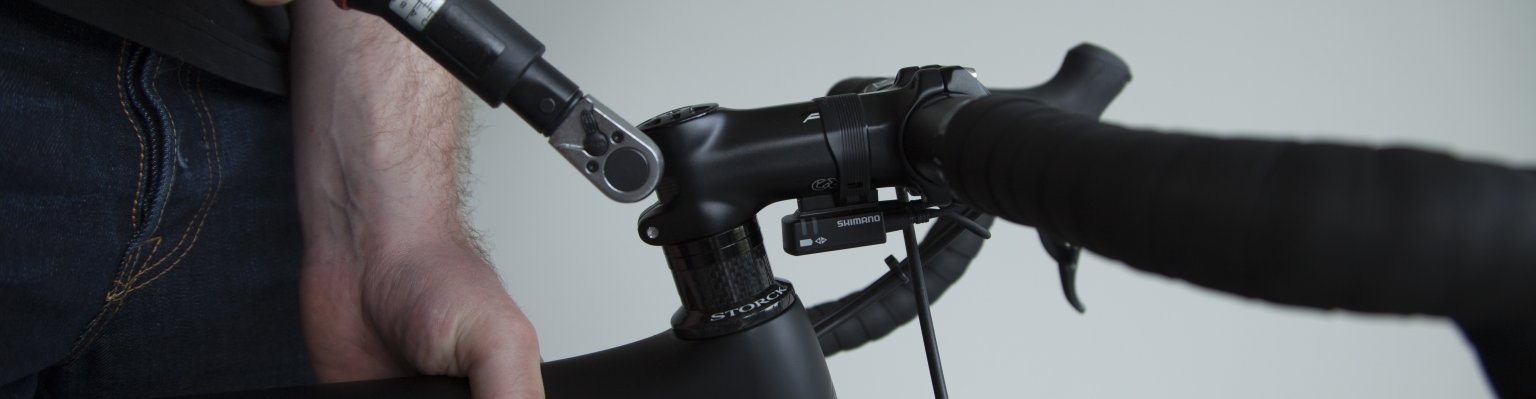
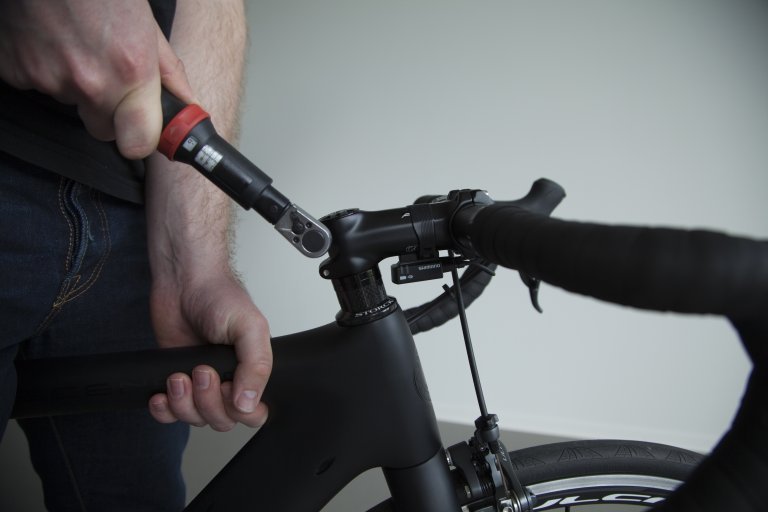



How to replace MTB chainrings
Use this easy to follow, photo-aided step-by-step guide to replace your chainrings before shifting performance deteriorates and your chain starts to slip.
Is the front of your bike wobbling or rattling? It could be the headset. Find out here how to check and adjust the headset bearing.
Every now and then, the headset on a bike loosens up a little. This is usually simply down to normal riding, which causes the bearings or clamped joints to settle over time, or vibrations shake something loose. Typical signs of a loose headset – also called the headset bearing – are play in the steering or a rattling noise when braking or riding on uneven ground. If you feel movement between the head tube and the stem, or between the head tube and the fork, you should check the headset preload. If the bearing feels a bit notchy and catches slightly, the headset may be worn.
In this guide, we'll explain exactly how to go about it. With a bit of tooling and a careful touch, you can easily adjust the bearing play yourself – whether on a touring bike, road bike, mountain bike, or gravel bike.
Note: Here we show you the procedure for an Ahead headset. The method described works both for carbon forks with an expander plug and for steel or aluminium forks with a star nut. If you're using a different headset system or a special cockpit, you should check your manufacturer's instructions.
To adjust the headset bearing, you'll usually need the following tools:
Adjusting the headset takes a bit of a delicate touch: the bearings need to be preloaded just enough that no play is noticeable between the steerer tube and the cups. At the same time, the preload must be low enough that the headset – and with it the handlebar – still turns smoothly.
To check the headset play, proceed as follows:
If the headset preload is too low, the steerer tube will move slightly within the headset bearings. You'll feel this play immediately at the handlebar or at the junction between the head tube and the fork.
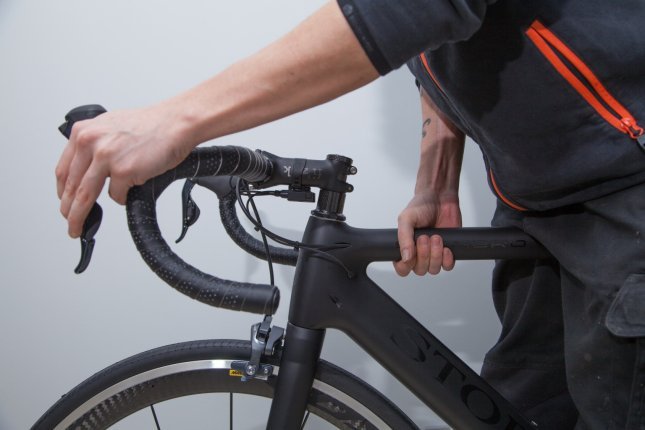
Pull the front brake and move the handlebar forwards and backwards! If the headset has play, you'll feel it immediately.
To feel the play directly and make sure the movement is really coming from the headset and not, for example, from loose brake pads, proceed as follows:
If you feel movement between the head tube and the fork crown, the headset probably has play. Follow our guide to set the preload correctly!
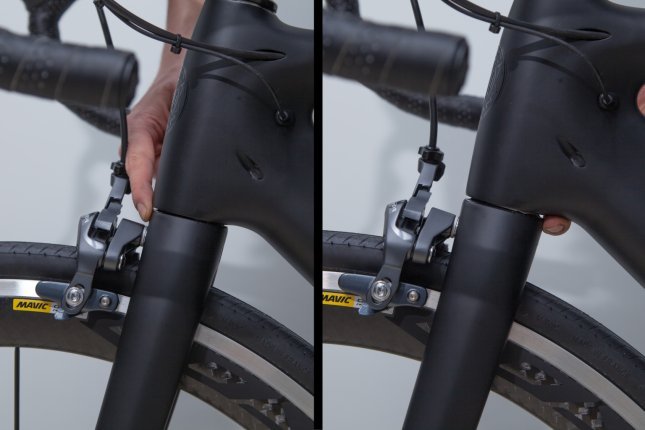
If the steerer tube moves inside the head tube, the play is coming from the headset.
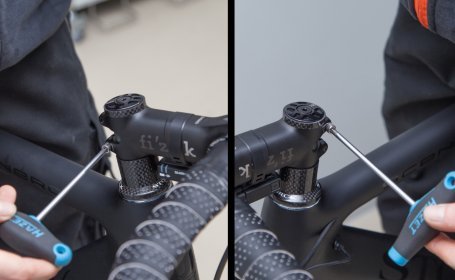
Loosen the stem's clamp bolts!
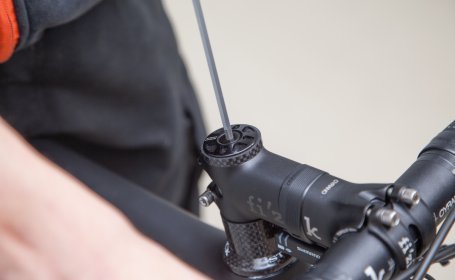
Carefully adjust the headset preload using the headset bolt!
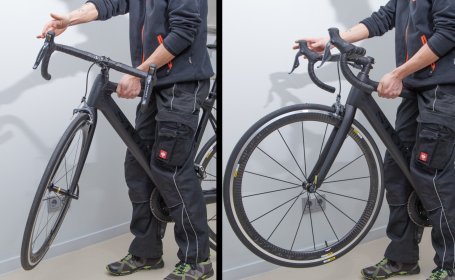
Check the headset preload!
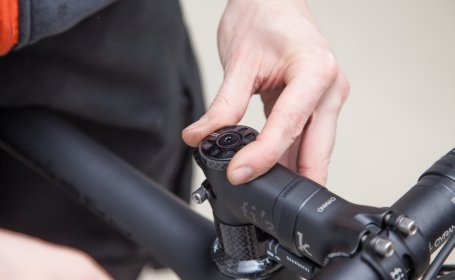
If the spacers no longer turn, the preload is usually sufficient.
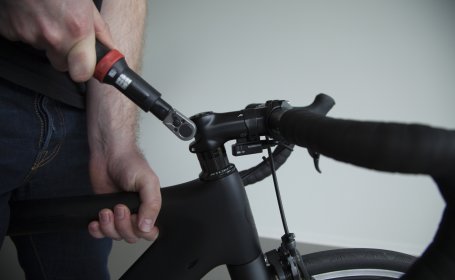
The stem is tightened again. Pay attention to the specified torque values here and tighten the bolts alternately!
If you still feel play in the headset bearing despite sufficient or even excessive preload, the bearing is either dirty and dry, worn, or the headset wasn't fitted correctly. If it's just dirt, a thorough cleaning and fresh grease often help. If the bearing is worn, the ball bearings will have pressed into the bearing cup and it will feel a bit notchy. The headset may also catch when the handlebar is pointing straight ahead. If you need a new headset or new bearings and aren't yet familiar with the S.H.I.S. standard, our guide "S.H.I.S. explained simply for everyone" can help.
If your bike is making noises elsewhere too, you'll find more troubleshooting tips in our guide: "Fixing creaking noises on your bike". And if you'd like to know which components on your bike you should service regularly, we have a handy inspection guide for that.
The simplest test: pull the front brake firmly and push the bike forwards and backwards! Place a finger on the junction between the lower bearing cup and the head tube as you do this: if you feel a click or movement there, the play really is in the headset and not in the brake caliper, the thru-axle, or the fork.
If the play reappears right after adjusting, the stem or top cap bolts usually aren't tightened correctly, the fork isn't seated properly, or a spacer is missing. If the play returns despite correct assembly, the headset is often worn and needs to be replaced.
A worn headset shows up as a rough, notchy feel when steering, or a noticeable catch when the handlebar is straight ahead. First check that the preload isn't too high and that the bearing isn't dry or dirty. If the bearing still feels rough despite correct preload and enough grease, the headset really is worn and needs replacing. Likewise, if you can't get rid of the play in the headset despite sufficient preload, that points to a worn headset bearing.
The preload set via the Ahead bolt should be just high enough that no play remains and the handlebar still turns easily – no tighter than that. Too much preload makes the bearings run stiffly and wear out.
Both terms are used for the same component: the bearing assembly that allows the fork to rotate in the frame.
The headset itself costs roughly ten to 300 euros, depending on the standard and quality. There are integrated (IS), semi-integrated (OS, EC) and press-fit headsets. Your new headset also needs to be compatible with the diameter(s) and shape of your head tube and steerer tube.
The headset is the bearing unit between the fork and the frame that makes steering possible in the first place. It ensures the fork turns smoothly and without play. If it's adjusted incorrectly or worn, the steering will feel loose or rough – both of which affect control and safety.
A loose, dry or worn headset creaks when steering, braking, or riding out of the saddle. First check the preload and play (follow this guide) and grease the bearing cups. If the creaking persists, the bearing is usually worn and needs to be replaced. Important: creaking can also come from the seatpost, stem, or bottom bracket. Narrow down the cause before replacing your headset!
Yes, that's the flip side of play: if the preload is too tight, the steering will feel stiff or catch slightly in the centre. Loosen the top cap a little and reset the preload – just tight enough that there's no more play and the handlebar still turns freely.
Use this easy to follow, photo-aided step-by-step guide to replace your chainrings before shifting performance deteriorates and your chain starts to slip.
Does your bike creak when you pedal or when it bounces? We’ll show you the most common reasons and what you can do to counteract creaking on the bike.
Changing out your handlebar tape can give your bike a fresh, clean look. This how-to provides easy instructions to get the job done right.
Truing wheels may seem like a daunting task, but using our how-to post turns it into child’s play. Read on and learn to do it yourself.
Send your unused goods back within 100 days after purchase and get your money back!
See more