
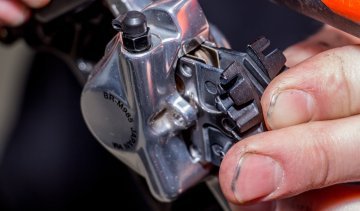
2 or 4-piston brake?
Disc brakes are now standard on most bikes and e-bikes. Here’s how to decide whether a 2- or 4-piston brake is right for you.
Installing bike pedals is quick and easy – yet there are a few things to look out for. We'll show you the most important tips & tricks.
A new bike, new pedals, bike transport, or regular maintenance work: There are various reasons to eventually install (and uninstall) your own bicycle pedals. We'll walk you through the process step by step and what you need to pay attention to, so your pedal swap goes smoothly.
Before you start, make sure you have everything you need! You can install bicycle pedals either with a 15-millimeter pedal wrench or an hex key (depending on the manufacturer, six or eight millimeters). If the flats on the pedal are wide enough, a standard 15-millimeter open-end wrench can also work. Pedal wrenches are flatter and usually longer. Some pedals offer both options (15 mm and hex). Additionally, you'll need assembly paste (note: not carbon assembly paste!), alternatively grease (preferably bearing grease) is also fine – and if old pedals won't budge, you should have some penetrating oil at hand. Let's get started!
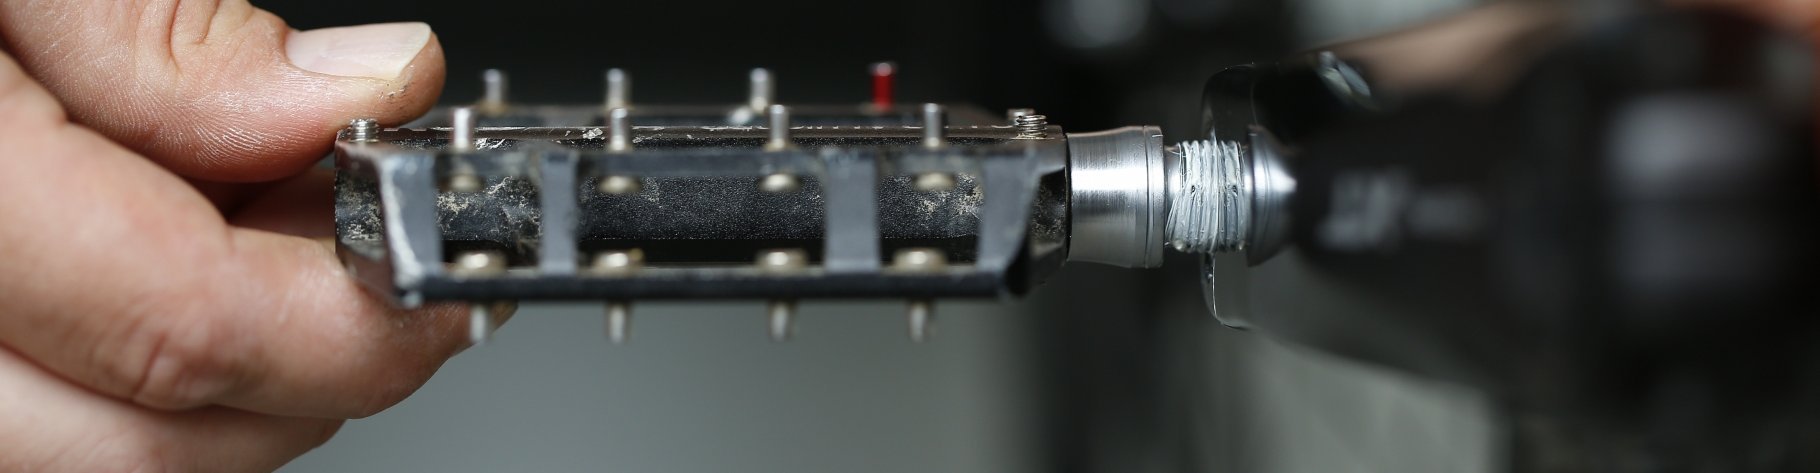
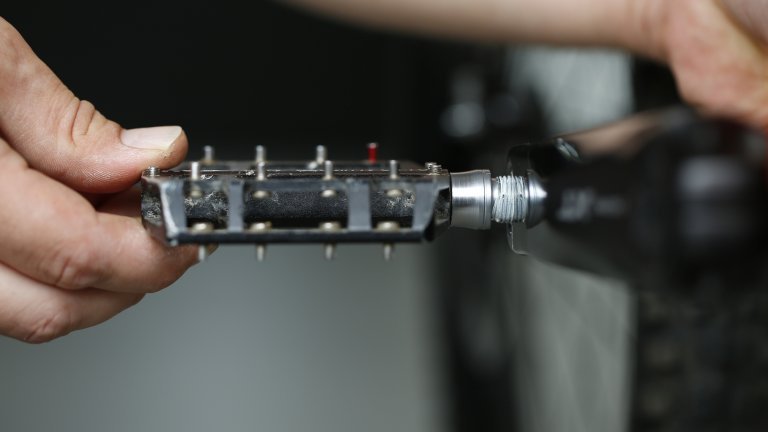
Securely position the bicycle with the crank horizontal! Start with the pedal you want to remove facing forward! Regardless of whether your pedals have a hex or pedal wrench fitting: Make sure you apply the tool correctly! The pedal wrench should fully encompass the pedal axle, and the hex key should be fully inserted into the fitting.
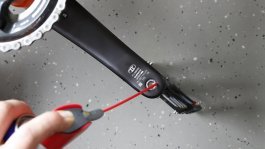
When installing and uninstalling pedals, always be mindful of the direction of rotation: The right pedal has a right-hand thread, and the left pedal a left-hand thread. To loosen the pedals, turn the wrench backward, towards the rear wheel.
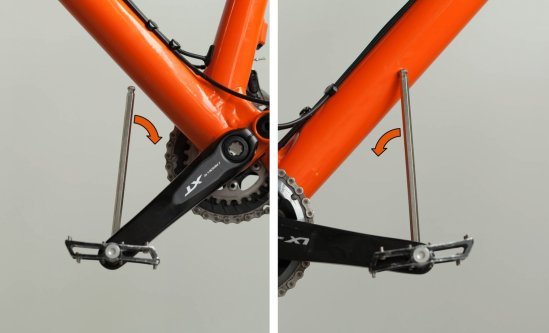
Left: Non-drive side, Right: Drive side. Loosen the pedals by turning your tool in the direction of the arrow, i.e. towards the rear wheel.

Make sure your hand or arm won’t get caught if the pedal suddenly comes loose.
Penetrating oils like WD-40, Brunox, or Ballistol can help break up corrosion in the thread.
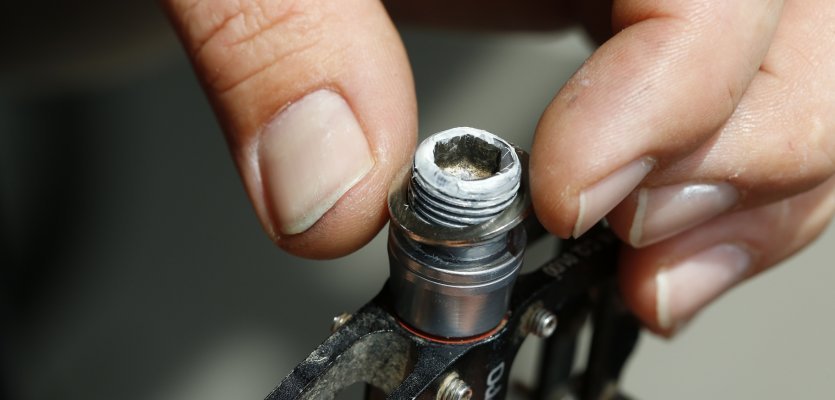
If your pedals have been on the bike for a long time, were installed with little or no assembly paste or grease, or were often exposed to moisture, the threads may be corroded. In this case, the pedals can usually be very difficult to remove or might not come off at all. Be very careful not to slip with the tool, as that can damage the tool fitting. Be sure to position your hand and arm in such a way that you don't injure yourself if the pedal suddenly comes loose! Caution is especially advised on the drive side: The teeth of the chainring have left scars in the hands of many hobby mechanics. For safety, you can position the chain on the largest chainring if you have a double or triple chainring setup. If you do slip, your hand will be somewhat protected from the sharp teeth of the chainring.
If you can't remove the pedal with the intended tool, do not use an improvised extension! Such levers can damage or even break the tool. If you have a 15-millimeter open-end fitting, a pedal wrench can save the day. It has a long lever, is designed for high loads, and works particularly well to loosen stuck pedals. Additionally, applying some penetrative oil to the back of the crank arm on the pedal thread can help. It seeps into the tightest thread turns and can aid in loosening the blockage. If you're still stuck, it might be time to head to the bike shop.
The left and right pedals have different thread directions. This is so that the pedals don't loosen themselves while you're pedaling, but rather tend to tighten up. Remember this, and you'll always know which way to turn to loosen or tighten the bicycle pedals: Loosening is always towards the back, opposite the direction of travel towards the rear wheel. Tightening is always forward, in the direction of travel towards the front wheel.
If the pedals aren't marked with "L" or "R" on the thread, you should take a closer look at the direction of the pedal threads. The slope of the thread (the thread pitch) will tell you which side is which: the right pedal's thread slopes upwards to the right, the left's to the left. Tip: On some models, the left pedal has a groove in the axle just before the thread.
You must absolutely make sure to screw the left pedal into the left crank arm and the right pedal into the right crank arm. The labels "left" and "right" always refer to the rider's perspective, meaning how you look at the crank from above when standing over the bike. If resistance increases suddenly before the thread is completely in the crank, you should unscrew it and take another close look. Trying to force it could destroy the thread of the crank.
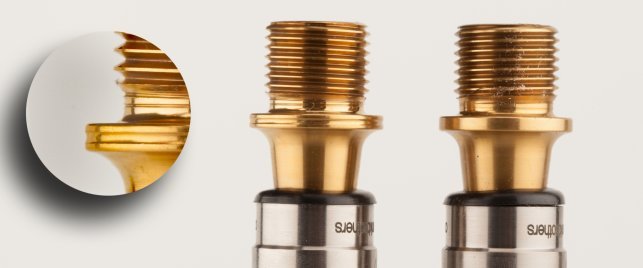
The angle of the thread slope lets you identify the right (right) and left (left) pedal. The left pedal also has a groove. © bc GmbH
You should always install pedals with pedal washers. The washer sits between the pedal and crank face, distributing the force evenly across the crank arm's face when tightening the pedal. If your crank didn't come with such washers, you can get them separately.
Before screwing them in, you should clean the threads of both the cranks and pedals and apply assembly paste (or grease). Don't be stingy! The assembly paste needs to fill any tiny air gaps in the entire thread to prevent moisture penetration. This helps prevent corrosion of the components.
Use a pedal washer between the pedal and crank arm.
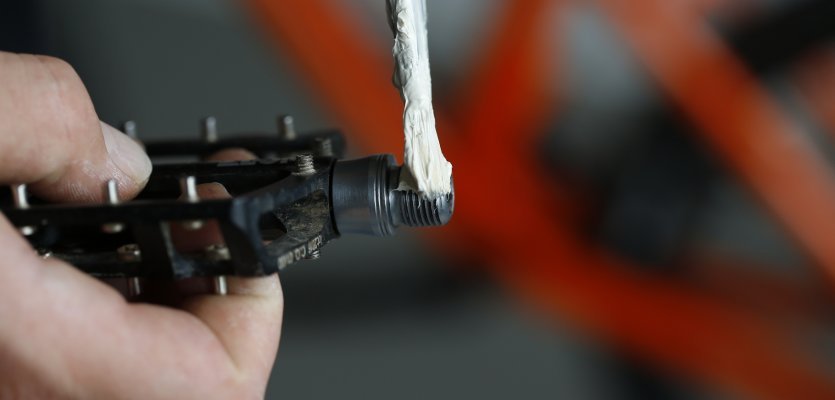
Generously coat the threads with grease or assembly paste before screwing them in.
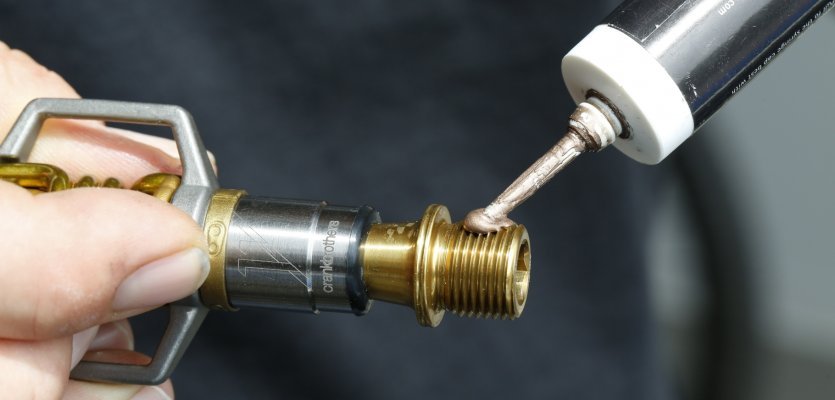
There are special assembly pastes for titanium axles.
To screw in the pedal, you'll turn the thread forward, towards the front wheel. When screwing in the pedal, make sure the axle turns smoothly, meaning without much friction. If it feels like it's catching or stuck, don't continue turning. You've likely misaligned the threads. If you keep going, you'll probably damage the crank thread or pedal thread (or both).
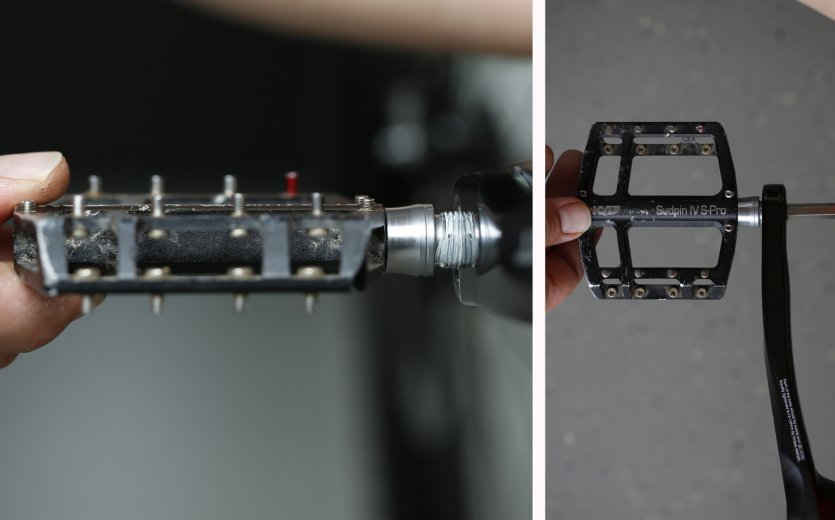
Start threading the pedal straight and screw it in carefully! It should go in with little resistance.
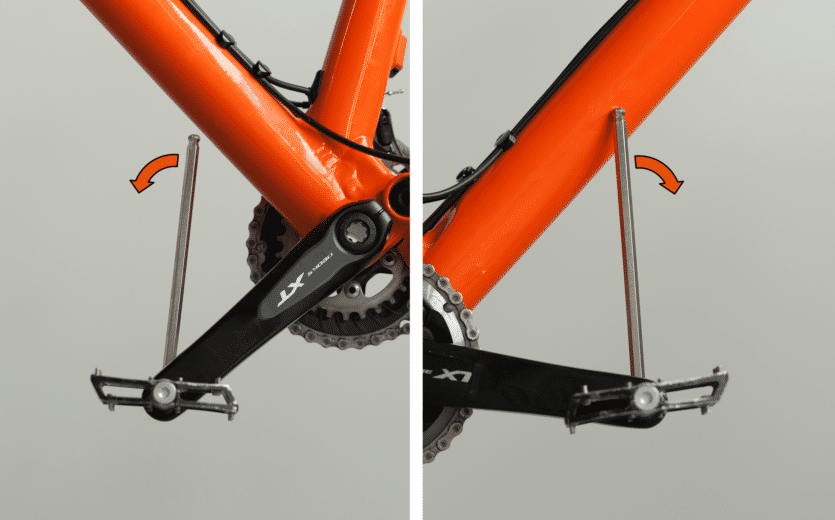
Left: Non-drive side, Right: Drive side. Tighten the pedals by turning your tool in the direction of the arrow, i.e. toward the front wheel.
Now, the pedals need to be tightened. Ideally, you'd do this with a torque wrench. The recommended torque can be found in the instructions provided by the pedal or crank manufacturer. Don't forget to wipe off any excess assembly paste that oozes out from the front and back of the crank thread. This way, you won’t collect unnecessary dust and dirt.
Now, you’re (back) on track. Remember to retighten the pedals after two or three rides! The screw connection can settle, losing some of its torque. Bicycle pedals are subjected to very high forces, so it pays to check this connection now and then.
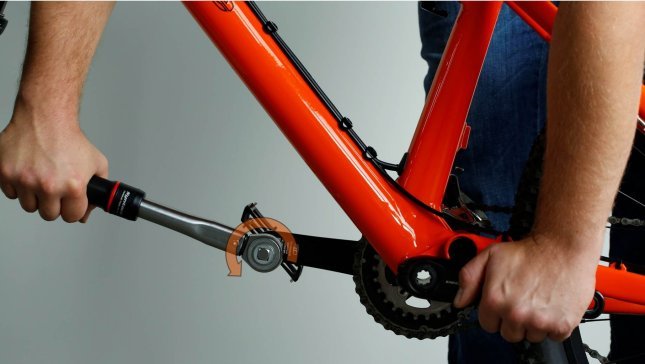
It's best to use a torque wrench when tightening the pedal. Use the opposite crank arm to apply counterforce.
Disc brakes are now standard on most bikes and e-bikes. Here’s how to decide whether a 2- or 4-piston brake is right for you.
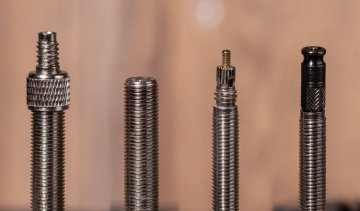
Our guide explains the main bicycle valve types and their differences – from classic Presta to the innovative Schwalbe Clik Valve.
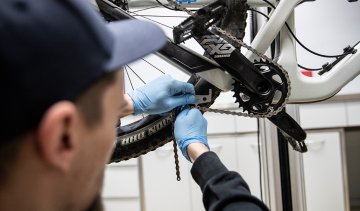
Brakes are one of the most critical safety component on your bike, so you should pay close attention to them during maintenance.

Ready for the season? We’ll show you how to prepare your bike for the upcoming season and which parts require special attention.
Is the chain on your MTB worn out? Do you want to fit a new one? No worries. We’ll explain how you can replace your chain on your bike.
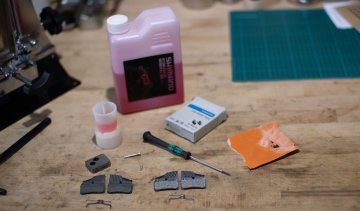
Changing brake pads on bicycle disc brakes? Easy. Take out the old pads and put in the new ones. But is it really that simple?
Yes. You should be aware that the right pedal has a (standard) right-hand thread and screws into the right crank arm. The left pedal has a left-hand thread and is screwed into the left crank arm. Pedal threads are standardized (9/16" x 20 tpi) and fit almost all common bicycle cranks. Exceptions are rare and usually found on very cheap or old bikes – e.g., one-piece cranksets with smaller thread size (1/2" x 20 tpi).
The left pedal has a left-hand thread and the right pedal has the usual right-hand thread. To tighten the pedals, you turn the axle towards the front wheel – the same direction as when pedaling. This is beneficial because it means the bicycle pedals typically don’t unscrew while you're pedaling.
Before installing your pedals, you should apply enough assembly paste (not carbon assembly paste!) on the thread. This prevents the threads from corroding due to moisture. If you don't have assembly paste, you can also use grease – preferably bearing grease.
To tighten your pedals, use a 15-millimeter pedal wrench or an Allen key. Make sure to pay attention to the different thread directions of the left and right pedals.
If your bicycle pedals won't come off, you can apply penetrating oil to the thread. Remember the different thread directions right and left! Use a 15-millimeter pedal wrench to extend your leverage! Be absolutely sure you don't injure yourself if the pedal suddenly comes loose!
Although both tools may have a 15-millimeter size, there are key differences. A true pedal wrench is specifically designed for the demands of pedal installation. It is generally much slimmer than a standard open-end wrench, allowing it to fit into the tight gap between the pedal body and crank arm, where a thicker wrench often cannot be applied. Furthermore, a pedal wrench is usually much longer, offering greater leverage. This increased leverage is invaluable for applying the high release torques needed for stuck pedals. A regular 15-millimeter open-end wrench may work for new or loose pedals, but the pedal wrench is clearly the superior and safer tool for stuck pedals.
Send your unused goods back within 100 days after purchase and get your money back!
See more


