


SRAM Transmission: Mechanical vs Electronic
Torn between the new mechanical and the proven electronic SRAM Eagle Transmission? Our guide highlights all the pros and cons.
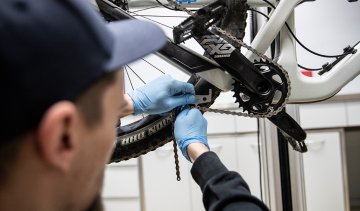
Whether you ride a Shimano or SRAM drivetrain, properly adjusting the derailleur on your MTB or e-MTB should be part of every rider’s basic maintenance.
The drivetrain of a bike is a rather complex system in which several mechanical components work together. These parts must be perfectly adjusted to ensure that the derailleur drivetrain operates smoothly and efficiently. Many riders struggle with this, and how often do we hear: “Oh no, adjusting gears… can you do it for me?” In reality, it’s not as difficult as many think. The key is understanding the mechanics behind it. Don’t just turn a screw – observe what actually happens. Which screw affects which part of the system? Before randomly adjusting everything and ending up frustrated, keep reading. We’ll explain the process step by step. Afterwards, you won’t just know how to adjust your gears – you’ll understand the entire system and eventually do it almost automatically.
Since most modern mountain bikes, including e-bikes, now use a single-chainring drivetrain where shifting only happens at the rear, adjustment is actually less complex than it used to be with both a rear derailleur and a front derailleur. To compensate for the missing gear range at the front, rear cassettes have become larger and now feature more sprockets to keep the jumps between gears manageable. Today, up to 12 sprockets must fit into the same space that previously held 9 or 10. The sprockets sit closer together, which also requires narrower chains. All of this means that drivetrain components need more precise fine-tuning than in the past.
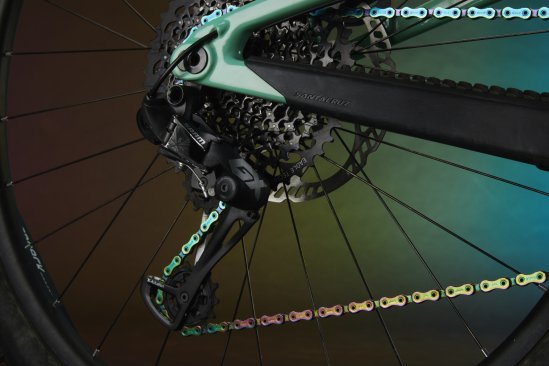
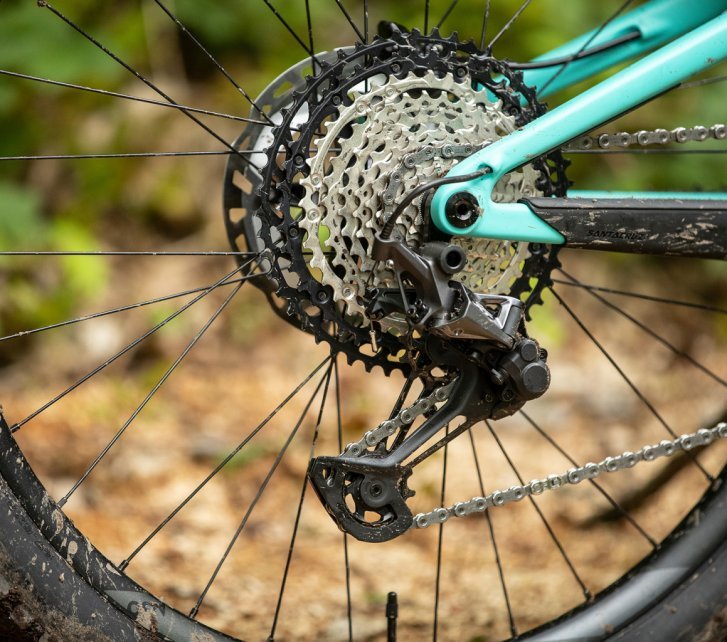
Modern 1x12 drivetrains have become the standard on mountain bikes. Shown here: SRAM GX Eagle.
And here: Shimano XTR. However, the way both systems work is almost identical.
To adjust your drivetrain as precisely as possible, a few requirements must be met. All drivetrain and shifting components need to be compatible with each other. The rear derailleur and shifter must come from the same manufacturer and ideally belong to the same groupset series. The most important factor, however, is the number of gears: a 12-speed rear derailleur can only be operated with a 12-speed shifter from the same manufacturer and requires a compatible 12-speed cassette and chain. Shimano and SRAM components cannot be mixed. Doing so will inevitably lead to problems and may even cause complete malfunction. Even though other brands offer compatible components, I personally recommend using original parts from the respective groupset manufacturer to ensure the best possible performance.
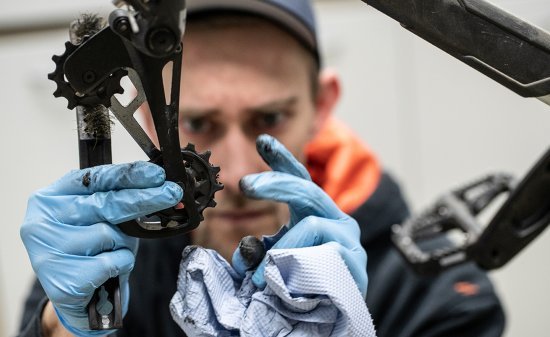
To ensure that your rear derailleur always shifts precisely, you need to maintain it over time. We’ll show you how.
Heavy dirt build-up, especially on sprockets, the chain and derailleur pulleys, can cause shifting problems. Thorough cleaning is therefore essential. For smooth shifting performance, the chain must be clean and properly lubricated. The derailleur joints also need to move freely. If they are dirty or if lubrication has been washed away through frequent use of a pressure washer, you can apply a drop of chain oil after cleaning. The same applies to the pulley bearings. In general, all components involved in the drivetrain should be clean and technically sound before adjusting the gears. The main cause of poor shifting performance is excessive friction.
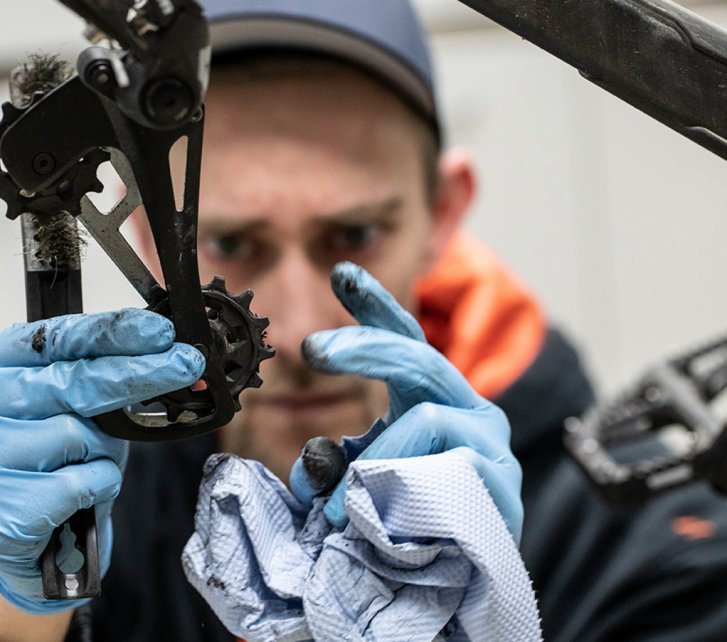
In addition to readjusting the stops, you should also clean the derailleur pulleys from dirt from time to time or replace them with new ones if necessary.
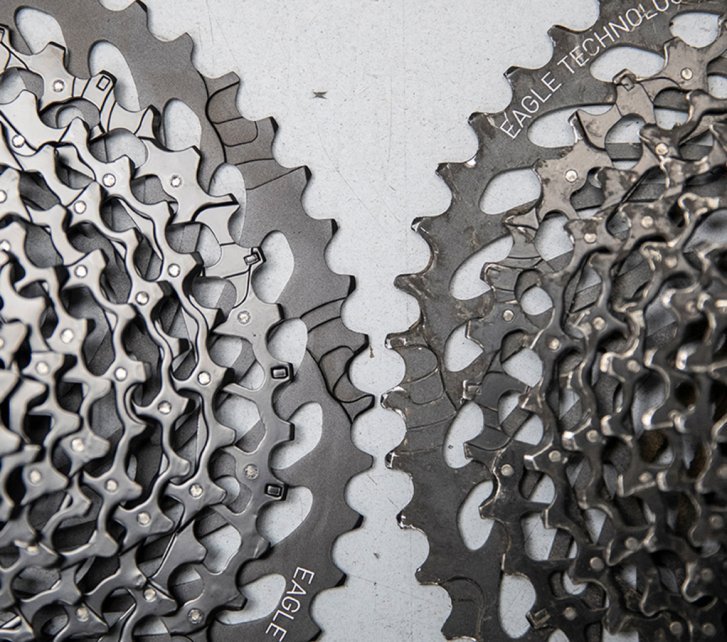
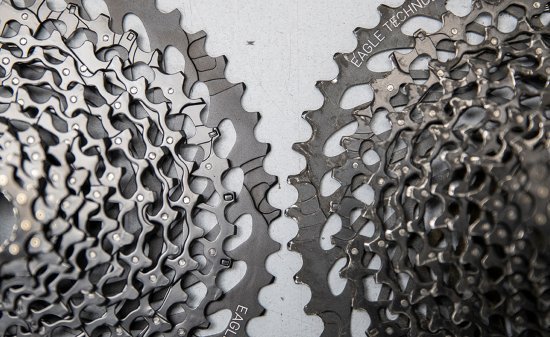
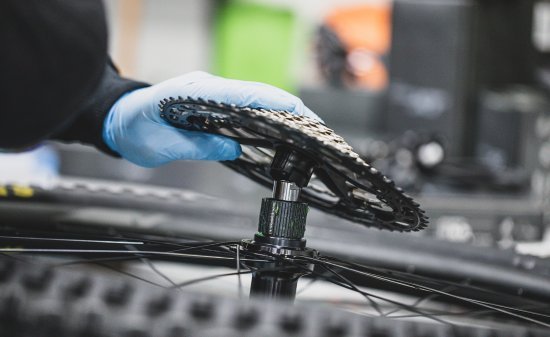
Start with the cassette: while it is mounted, grab the largest sprocket at two opposite points and try to rock the cassette sideways. There should be little to no noticeable play. Also check the cassette lockring torque on the freehub (40 Nm). The cassette should still be in good condition in terms of wear. Pointed teeth, often referred to as “shark teeth”, are a clear sign that the cassette needs replacing. Inspect the cassette for any damage as well, such as bent or broken teeth. If you find any, the cassette must also be replaced.
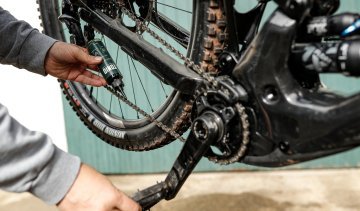
If you spend a lot of time on your bike, sooner or later it will be time to service the drivetrain.
The rear derailleur must be securely mounted to the derailleur hanger using the specified torque. Of course, it must not be bent or twisted – something that can easily happen during serious mountain biking. On rough descents, the derailleur may strike rocks, and in most cases, the rock wins. Constant vibrations on the trails will also eventually wear out the derailleur pivots. You can feel this by grabbing the cage at the bottom and moving it sideways. Only a rear derailleur without play can shift gears reliably, quickly and precisely. Also check the lateral play of the derailleur pulleys (ideally with the chain removed) by wiggling them. If the bearings are worn, the pulleys will tilt from side to side. In this case, the derailleur can no longer position the chain accurately beneath the selected sprocket or keep it aligned with the cassette. SRAM offers a useful feature on many of its derailleurs called Cage Lock: the cage can be pushed forward and locked in place. This was originally designed to make rear wheel installation and removal easier, but it also helps identify play in the cage, mounting points and pulley wheels. Once chain tension is removed, any play becomes much easier to detect.
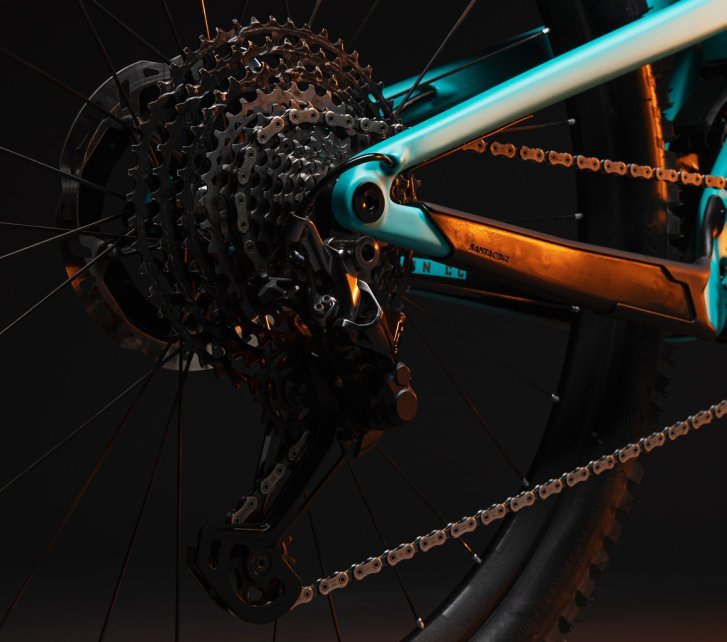
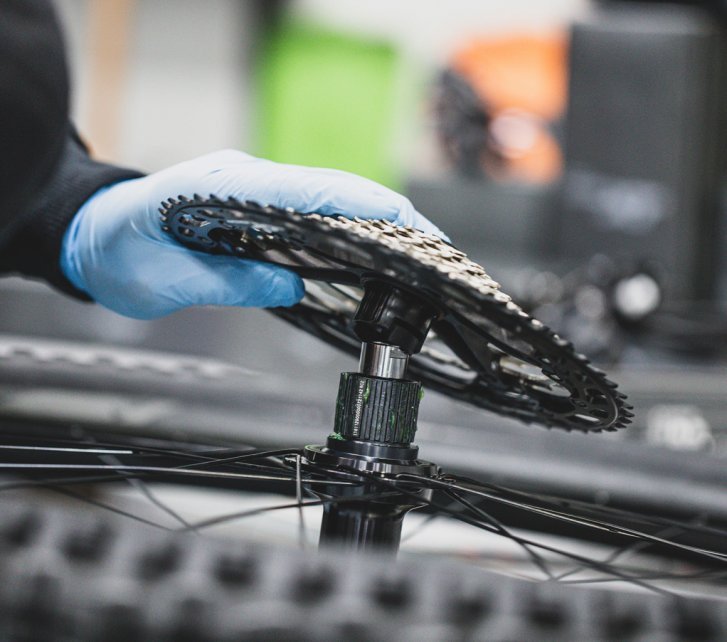
Consider the compatibility of the cassette with the freehub body when choosing your groupset.
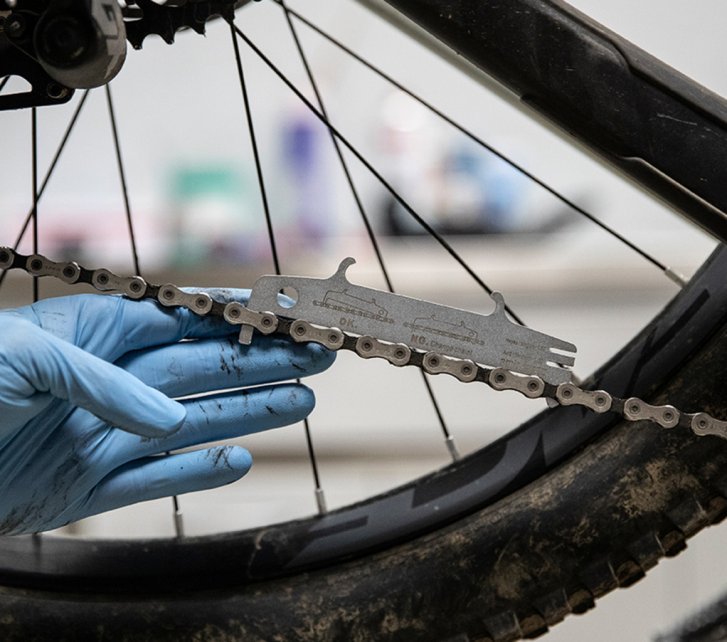
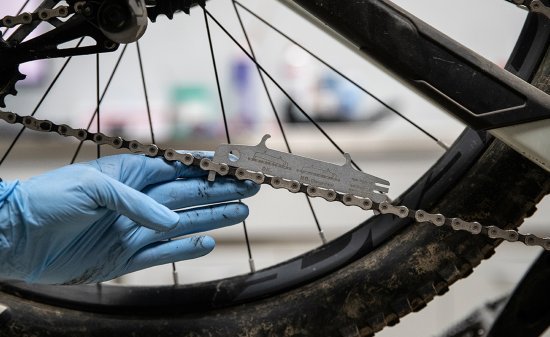
While you’re at it, you should also check the condition of the teeth on the derailleur pulleys: just like the cassette and front chainring, the pulley teeth must not be worn or damaged. If you are unsure, simply compare them with a picture of a new pulley wheel if you don’t have a new one available. If you want to continue using your current chain instead of installing a new one, check it beforehand with a chain wear tool for elongation. Especially on mountain bikes, the chain is also subjected to strong lateral forces caused by vibrations and impacts. If you feel excessive play when twisting the chain sideways and it bends very easily, it needs to be replaced. You can find more information in this blog article.
If you spend a lot of time on your bike, sooner or later it will be time for a new chain.
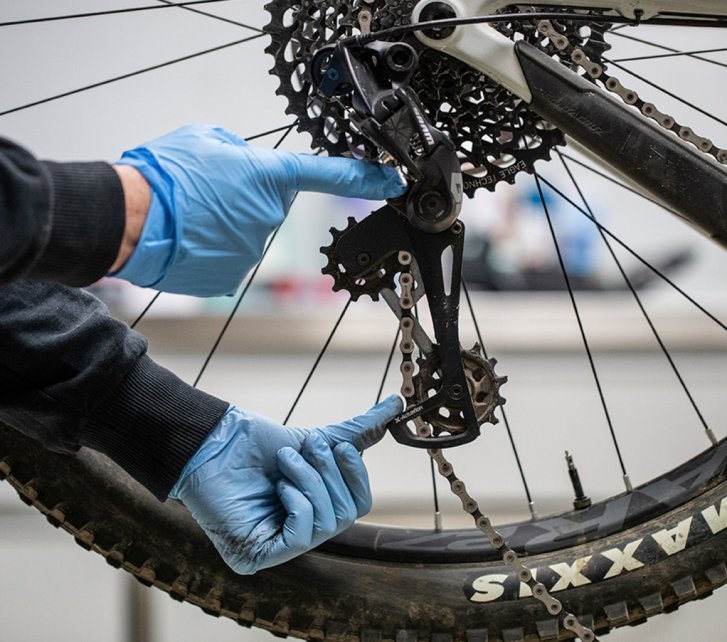
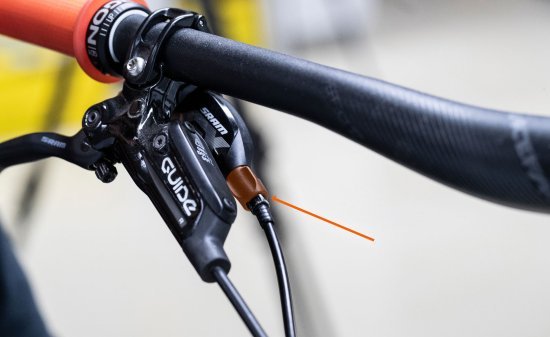
Modern 11-speed and 12-speed derailleurs from Shimano and SRAM feature a mechanism inside the connection between the derailleur body and cage that increases chain tension. A type of overload clutch integrated into the derailleur cage pivot uses friction to stabilise chain tension and significantly reduce chain slap. During impacts, rough terrain or jump landings, the cage can no longer swing forward uncontrollably and cause the chain to slap around, as can happen on derailleurs where only the cage spring provides tension. This makes the drivetrain much quieter in rough terrain and greatly reduces the risk of the chain dropping from the chainring. SRAM refers to this clutch mechanism as the Roller Bearing Clutch (found on Type 2, Type 2.1 and Type 3 derailleurs), while Shimano identifies this feature with the Plus designation in the model name. On SRAM derailleurs, the clutch is always active, whereas on Shimano derailleurs it can be switched on and off using a small lever. Since this technology is also subject to wear, you should check whether the clutch still functions correctly: the cage should only move forward with noticeable resistance. You should clearly feel a breakaway force in the pivot before compressing the spring. That’s exactly how it should feel.
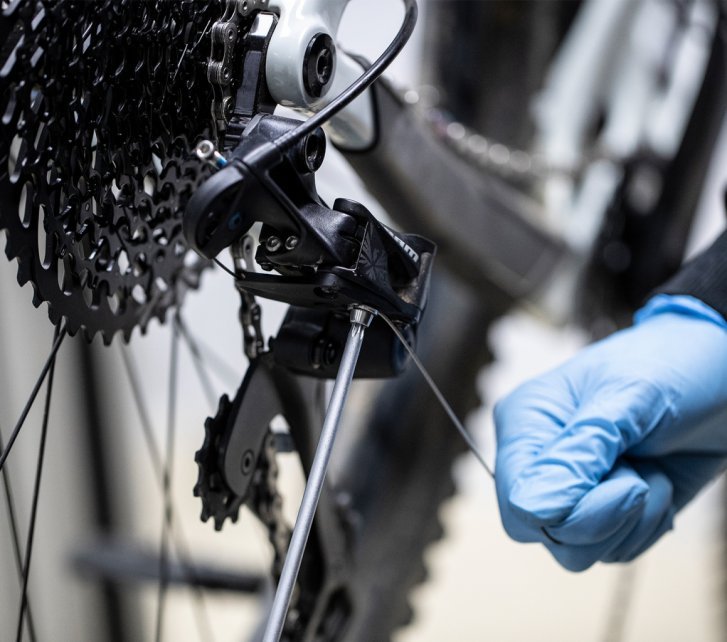
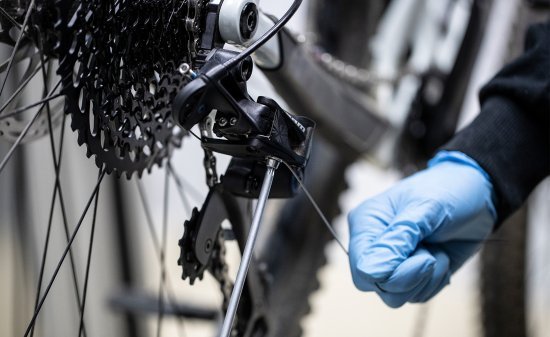
Release the chain tension. The Cage Lock function helps you do this for SRAM derailleurs.
If the rear derailleur strikes a solid object, the derailleur hanger can easily become bent, even if the derailleur itself appears mostly undamaged. That is exactly what it is designed for: it acts as a sacrificial part between the frame and the derailleur. If something breaks, it is far better for this inexpensive component to fail than the derailleur or even the frame itself. A visibly bent derailleur hanger makes precise derailleur adjustment virtually impossible. Depending on the damage, it may be possible to realign it using a derailleur hanger alignment tool. However, modern thru-axle frames often use more robust CNC-machined aluminium hangers, which are considerably harder to straighten. For this reason, we recommend replacing a damaged derailleur hanger with a new one straight away.
Shimano XT Shadow Plus rear derailleur. The derailleur hanger connects the frame and the rear derailleur.
For the shifter to transmit precise “commands” to the rear derailleur, both the shift cable and the protective housing must be installed correctly. If you install a new shift cable, you should always check whether it moves smoothly through the entire housing. If not, it’s best to replace the housing as well. When shortening a new cable housing, it is important to make a clean cut at a perfect 90-degree angle. Never use side cutters or standard pliers, as these will crush the housing. A proper cable cutter cuts the housing cleanly without deforming it. Using a specially coated shift cable can reduce friction even further.
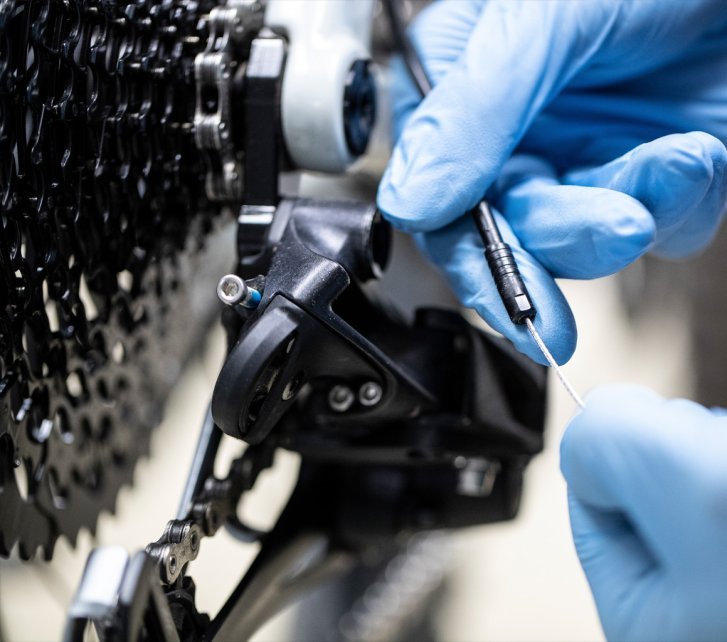
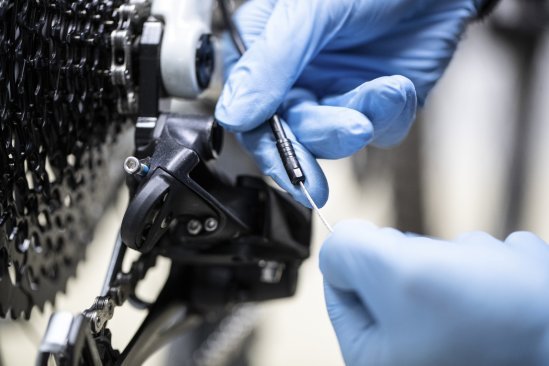
Tip: Use a needle to carefully open up the inner liner at the cut end of the housing, as this area can sometimes create additional friction.
Check the friction of the shift cable inside the housing. Precise shifting is only possible with minimal friction!
Overly tight bends in the cable housing increase friction unnecessarily and should therefore be avoided.
The end cap must be pressed firmly onto the housing so that it cannot settle further later on, which would otherwise alter cable tension. Some riders lubricate their shift cables during installation, but if you do so, apply only a small amount of a low-viscosity lubricant such as fork oil or sewing machine oil.
Avoid tight bends when routing the cable housing. A slightly longer housing with wider “curves” reduces friction.
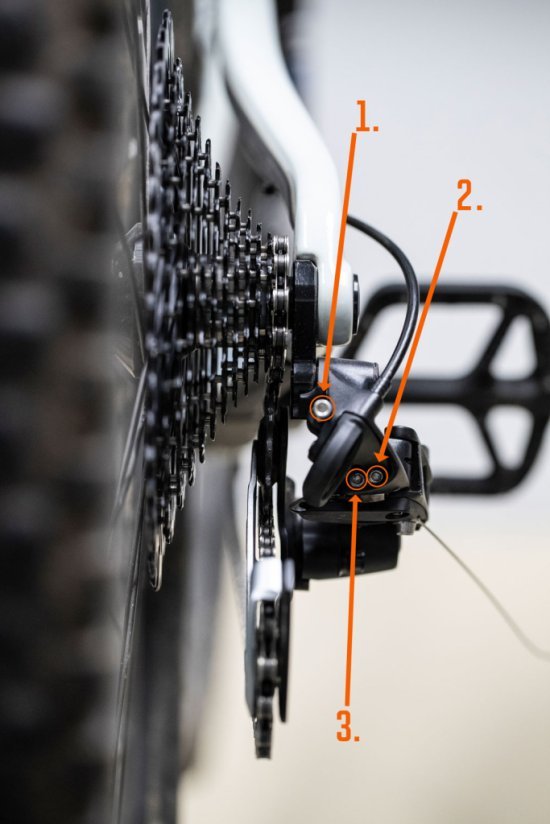
Here you can see all adjustment screws at a glance.
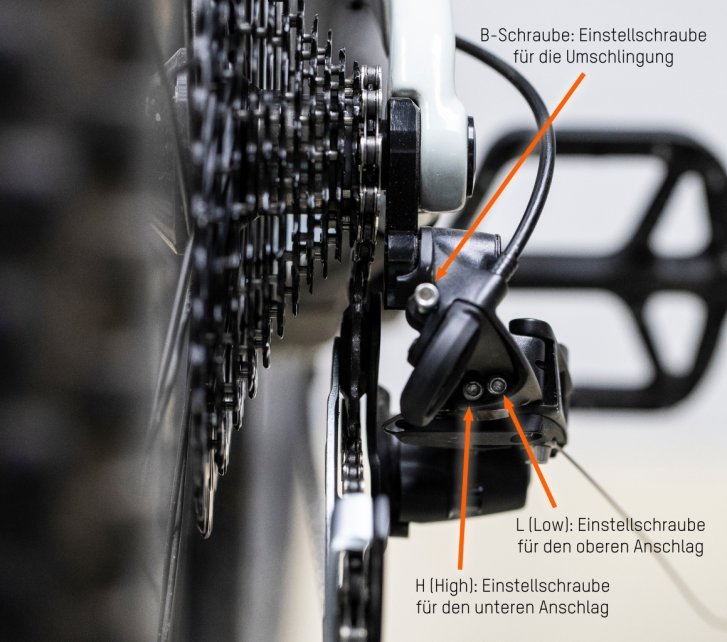
Before we begin with the adjustment process, here is a quick overview of the three adjustment screws found on a modern rear derailleur. A SRAM Eagle 12-speed derailleur is used here as an example. However, the screws and their functions are the same on both SRAM and Shimano derailleurs, and their layout is also very similar.
1. B-screw
This screw controls the amount of chain wrap around the cassette and the distance between the upper derailleur pulley and the selected sprocket.
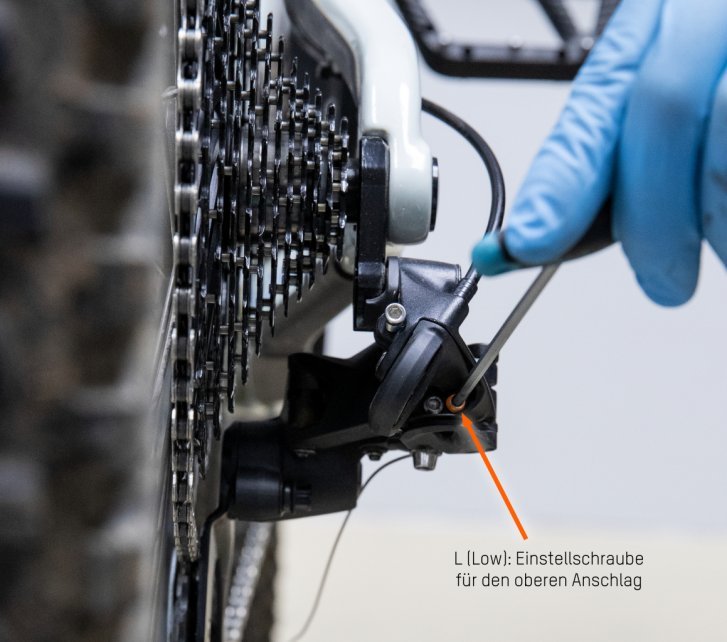
2. L-screw (Low Limit Screw)
This screw sets the upper limit of the derailleur’s movement range at the largest sprocket of the cassette.
3. H-screw (High Limit Screw)
This screw sets the lower limit of the derailleur’s movement range at the smallest sprocket of the cassette.
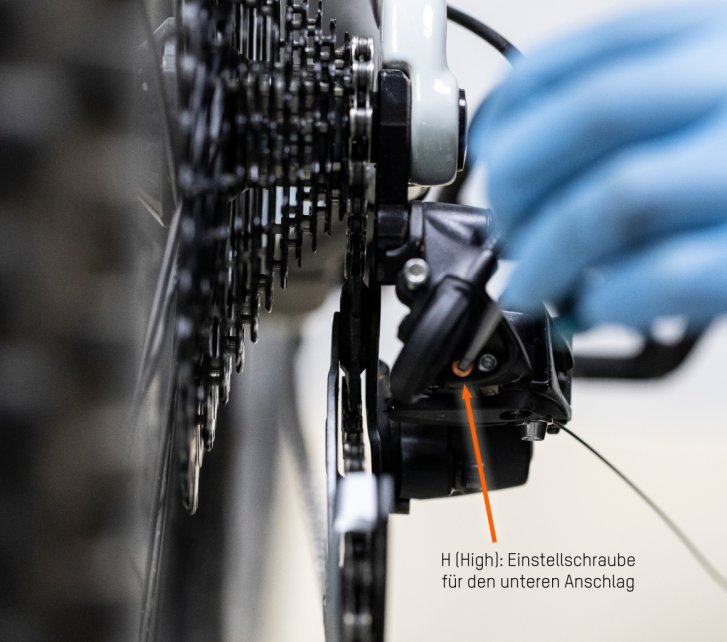
When shifting into the easiest or hardest gear, poor adjustment can cause the chain to fall either between the smallest sprocket and the frame or between the largest sprocket and the spokes if it overshifts beyond the cassette. To prevent this, the derailleur’s range of movement can be limited in both directions using so-called limit stops. These are small tabs on the derailleur body that act as stops when the derailleur parallelogram moves and come into contact with individually adjustable screws. This prevents the derailleur from moving too far and throwing the chain beyond the cassette. Observe when and where the derailleur’s rear “tab” comes into contact with the limit screw. The first step is adjusting the “lower” limit stop, which controls movement on the smallest sprocket. This is done using the H-screw (High Limit Screw or H-Screw). In this context, “high” refers symbolically to the hardest gear. When shifted onto the smallest sprocket, the upper derailleur pulley must sit perfectly aligned beneath the smallest cassette sprocket and must not move further towards the frame. Ideally, this initial adjustment is done without the shift cable and chain installed. Important: the shifter must be set to the hardest gear. If you only want to check or fine-tune the limit, this can also be done with the chain and cable installed. Turning the limit screw clockwise moves the stop to the left, towards the spokes. Turning it counter-clockwise moves the stop further to the right, towards the frame.
Turning the H-screw clockwise moves the limit further inwards, towards the wheel.
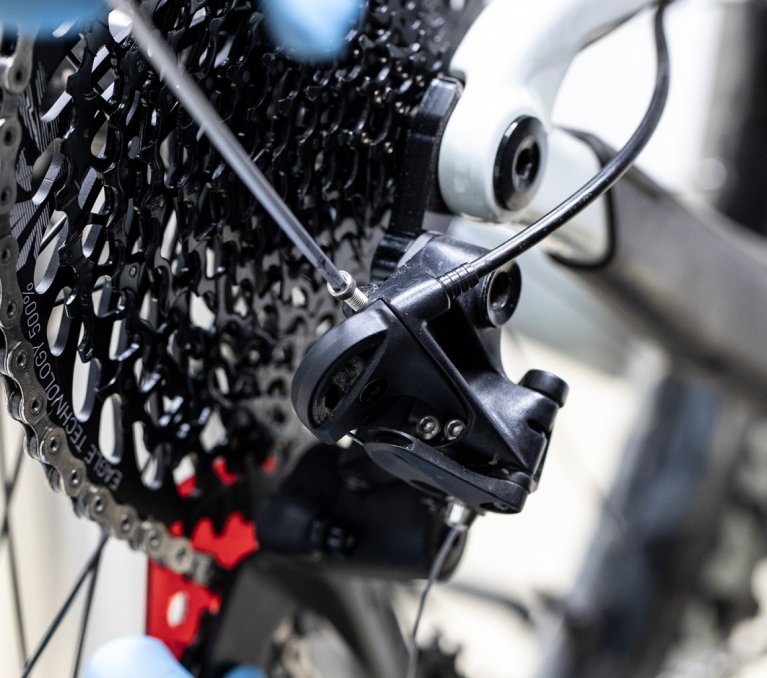
On this SRAM rear derailleur, the shift cable runs through a small channel machined into the cable clamp plate.
From this point, the cable tension is adjusted. As a general rule, when the derailleur pulley sits beneath the smallest sprocket, the shift cable should have only minimal preload. On the shifter, where the cable housing exits, there is a small barrel adjuster that can be turned without tools. It should first be screwed fully clockwise and then backed out again by about one or two turns counter-clockwise. This gives you adjustment range in both directions. If, in this position, the shift cable is too tight, too loose or the derailleur pulley is not positioned exactly beneath the smallest sprocket, the cable clamp at the derailleur must be readjusted. If a shift cable has already been clamped and unclamped several times, it should be replaced, as individual strands are often damaged and the cable may eventually snap. Once the shift cable is correctly secured, the excess cable can be cut off using a cable cutter. To protect the cut end, a cable end cap should then be crimped onto the cable.
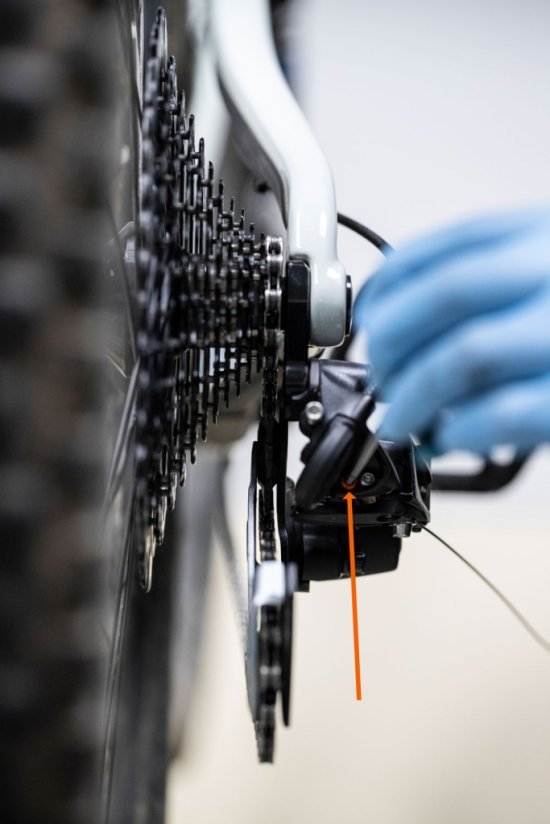
Next, we adjust the “upper” limit stop, which controls the derailleur movement at the largest sprocket of the cassette. Shift into the easiest gear to begin. The limit is adjusted using the L-screw (Low Limit Screw or L-Screw). With the chain sitting on the largest sprocket, try to push the derailleur slightly further towards the spokes by pressing the shifter. If the derailleur can still move further, the L-screw must be tightened clockwise. Otherwise, the chain may overshift beyond the largest sprocket and become trapped between the cassette and the spokes, which often results in damage to the wheel spokes.
If the derailleur cannot shift into the easiest gear at all because the limit stop blocks movement too early, the L-screw must be turned counter-clockwise. The adjustment is perfect when the derailleur reaches the easiest gear cleanly and without resistance, but cannot move any further towards the spokes when additional pressure is applied to the shifter. In this position, the derailleur limit stop is just barely touching the L-screw, without pressure. The upper derailleur pulley should now sit perfectly aligned beneath the largest sprocket.
Turning the L-screw clockwise moves the limit towards the smaller sprockets.
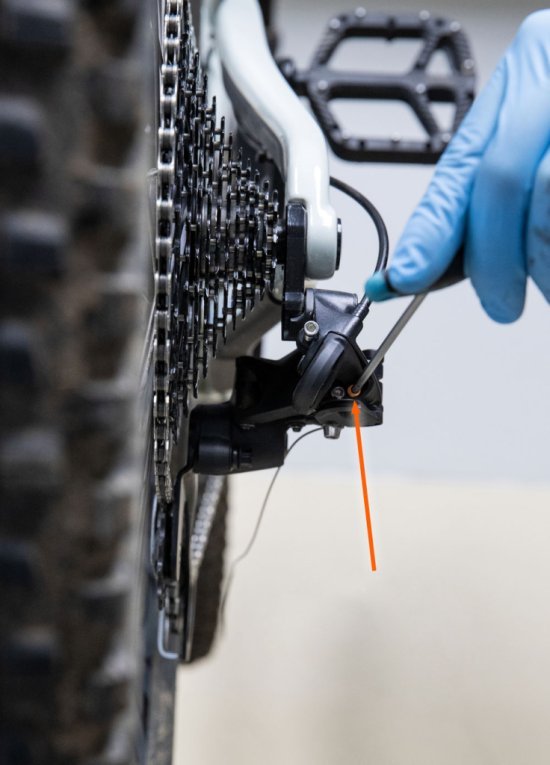
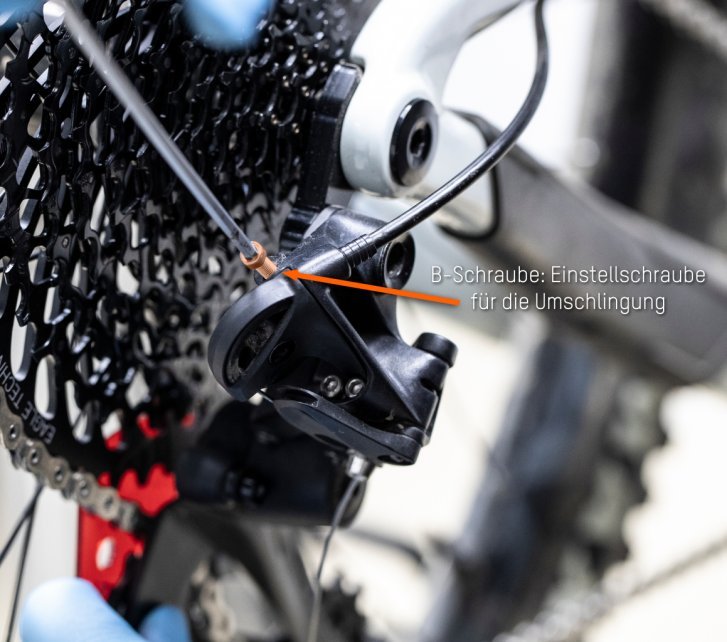
Turning the B-screw counter-clockwise increases chain wrap and raises the derailleur pulley.
Chain wrap describes the arc in which the chain engages with the sprocket. The amount of chain wrap also determines the height of the upper derailleur pulley and therefore its distance from the cassette sprockets. If the pulley sits too high, it can contact the next larger sprocket during shifting and cause the drivetrain to jam. If it sits too low, the derailleur will struggle to shift gears properly – or may not shift at all – because the chain can only flex sideways to a limited degree. You adjust chain wrap using the rear adjustment screw (B-screw or B-gap screw). Similar to the limit screws, it presses against a small metal tab on the derailleur hanger and rotates the derailleur body forwards or backwards around its mounting point. This changes both the amount of chain wrap and the distance between the upper pulley and the cassette sprockets.
The higher the upper pulley sits, the more the chain wraps around the sprocket (greater chain wrap). This improves load distribution and reduces wear. A good rule of thumb for chain wrap and pulley height is therefore: as high as possible, as low as necessary. Turning the B-screw counter-clockwise increases chain wrap and raises the pulley. Turning it clockwise reduces chain wrap and lowers the pulley.
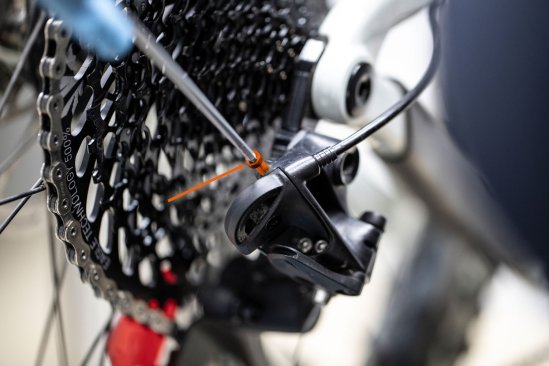
Left: SRAM provides setup gauges for the recommended adjustment, making it much easier to achieve the correct amount of chain wrap.
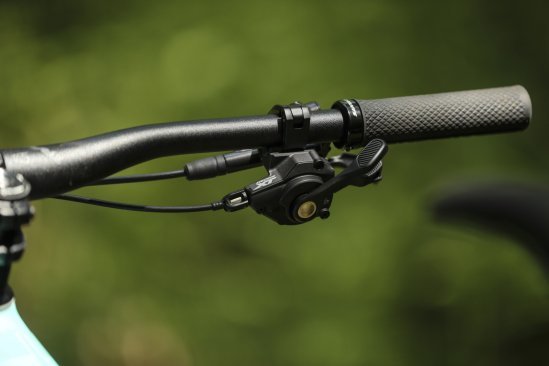
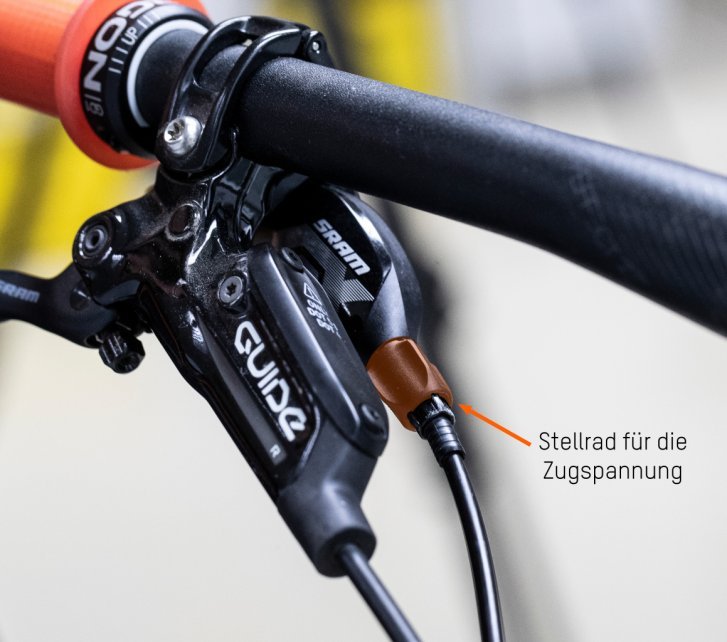
If necessary, the rear derailleur is now fine-tuned using the barrel adjuster on the shifter. You’ll find it where the cable housing meets the shifter body. Shift one gear at a time from the easiest gear down to the hardest gear and then all the way back up again. You’ll notice that the chain may shift more willingly in one direction than the other. The goal is to find the “sweet spot” where the chain shifts smoothly and without rattling onto both larger and smaller neighbouring sprockets. If the chain hesitates to shift up onto a larger sprocket, turn the barrel adjuster counter-clockwise (viewed from the cable housing towards the shifter) in quarter-turn increments. This increases cable tension, moves the derailleur cage slightly towards the larger sprockets and helps the chain shift upwards more easily. If the chain refuses to shift quickly and smoothly onto a smaller sprocket, turn the adjuster clockwise (again viewed from the cable housing towards the shifter), also in quarter-turn increments. This reduces cable tension, moves the derailleur cage slightly towards the smaller sprockets and helps the chain shift down more easily. To achieve smooth shifting across all gears, it may be necessary to shift through the entire cassette several times in both directions while making repeated small corrections. A new shift cable will stretch slightly during the first rides, so it is perfectly normal to readjust cable tension after a short break-in period.
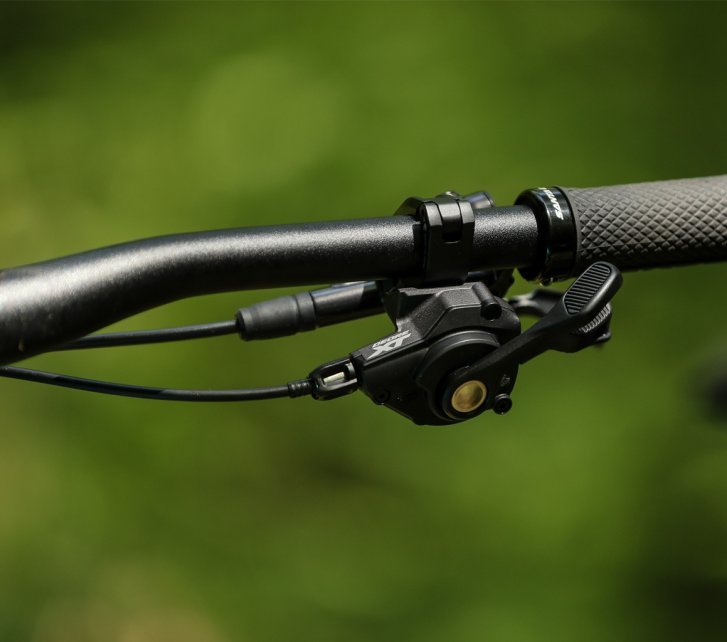
The barrel adjuster at the cable exit of the shifter is used to adjust cable tension.
Torn between the new mechanical and the proven electronic SRAM Eagle Transmission? Our guide highlights all the pros and cons.
Is the chain on your MTB worn out? Do you want to fit a new one? No worries. We’ll explain how you can replace your chain on your bike.
Well-greased chains are smooth, quiet, and shift with precision. But which lubricant is the best? Here are some tips for proper chain care.

XTR, XX1, X01, Deore, etc. – The choice of shifters & derailleurs for MTBs is huge. Find out which is the right one for you here.

Choosing the right chainring for your single-speed setup is crucial. We'll show you what's important so you can pedal efficiently.

With the right tools, replacing the cassette on your MTB is a quick and easy task. We’ll show you how it’s done.
Send your unused goods back within 100 days after purchase and get your money back!
See more


